Postman is one of my favorite tools for testing the functionality and security of APIs. It allows you to organize API routes neatly and write/run automated tests across collections of requests.
If you have access to the API spec of an application you are testing, you can easily import the mapped API directly into Postman in a structured fashion.
But not all APIs have public spec files or even documentation. Sometimes, we have to fly a little blind.
Well, not completely blind. We can use a proxy to capture the requests that form the API.
The Process
There are many proxies to choose. From the CLI tool mitmproxy to the feature-packed hacking tool, Burpsuite. It doesn’t matter which one you choose; they all serve the same purpose: capturing web traffic.
The tricky part is getting that captured data into Postman in an organized fashion.
Postman does have a proxy built in, which, although convenient, doesn’t organize the routes the way importing API spec would.
I used to use a technique I learned in APIsec University’s API Pentesting Course that involved using mitmproxy to capture the traffic, then mitmproxy2swagger to turn the captured data into API spec.
This worked well, but I’m not the biggest fan of mitmproxy. I like using Burpsuite to manage my testing and found myself flipping back and forth between them.
I then stumbled upon this Burp extension that exported selected requests into a Postman collection format. But it didn’t do any formatting or structuring.
There had to be a better way…
Enter Burp2API
Then, while I was thinking about developing my own tool, I stumbled upon this little gem: Burp2API. It’s a Python script that converts exported requests from Burpsuite into the OpenAPI spec format.
My prayers had been answered!
It’s basically mitmproxy2swagger but with the added benefit of not being dependent on mitmproxy.
Why not just use mitmproxy?
Don’t get me wrong, mitmproxy is a great tool, and I’m sure you CLI cronies out there swear by it. But there are numerous benefits to using Burpsuite over it.
Firstly, it’s great for project management. You can specify a scope, make observations with Burp Organizer, and track any issues Burp automatically identifies.
Secondly (and probably the most important), you have automated mapping capabilities. You can use Burp to scan and crawl to find endpoints you may miss by relying on manual browsing alone.
Lastly, as a pentester, you will undoubtedly go back to Burp after your initial exploration phase. So, why not just stay there? That way, you can keep all of your gathered traffic in one place for more convenient analysis later.
At the end of the day, we’re hackers. It makes sense to use the best tool for the job.
I’m also big on simplicity. So, if I can get the same or better results using fewer tools, that’s a win for me. Plus, I’d rather be an expert with a few tools than skim the surface with many.
Reverse Engineering crAPI
For demonstration purposes, I’ll be using OWASP’s crAPI. crAPI is an intentionally vulnerable API. I love it because it’s built with a modern front end, making it feel more realistic.
I highly recommend sharpening your skills with crAPI. As a realistic target, it allows you to practice the hacker mindset, rather than just regurgitating the exact steps you need to follow to solve a level in a CTF-like environment.
So, let’s put our hacking caps on and dive in!
Step 1: Manually gathering traffic
The first step in our reverse engineering journey involves browsing the application as a normal user might. Nothing too glamorous.
However, we’ll be running Burpsuite in the background so we can get a more in-depth look at how the application is working behind the scenes.
I’m not going to go in-depth about how to set up Burp as a proxy, so here’s an article on that.
The goal here is to cover every function of the app:
- Signing in
- Uploading profile pictures
- Buying products
- Commenting on posts
- Resetting the account password
Whatever the app allows us to do, we’re going to do.
Remember, we’re not looking to break anything just yet, but don’t let that stop you from thinking about potential attack vectors while getting to know the app.
Just by creating an account and signing into crAPI, I’m able to get an idea of how the API is structured:

I’ve heard the argument that you should spend a ton of time getting to know the target application before you even fire up any hacking tools. While I partially agree with this sentiment, I believe that you should always have Burp running in the background as soon as you start browsing the app.
You may capture requests or find some functionality that you would miss if you do a second pass with Burpsuite. Plus, Burpsuite passively scans captured traffic, so the more data, the better.
Step 2: Discover more routes
After exhausting manual exploration, it’s time to let Burp take the reins. There are a couple of ways that we can do this within Burp:
- Using a scan to crawl the application
- Using extensions
Launching a scan with Burp
To use Burp’s scanning capabilities, go to the Dashboard and click the New scan button:
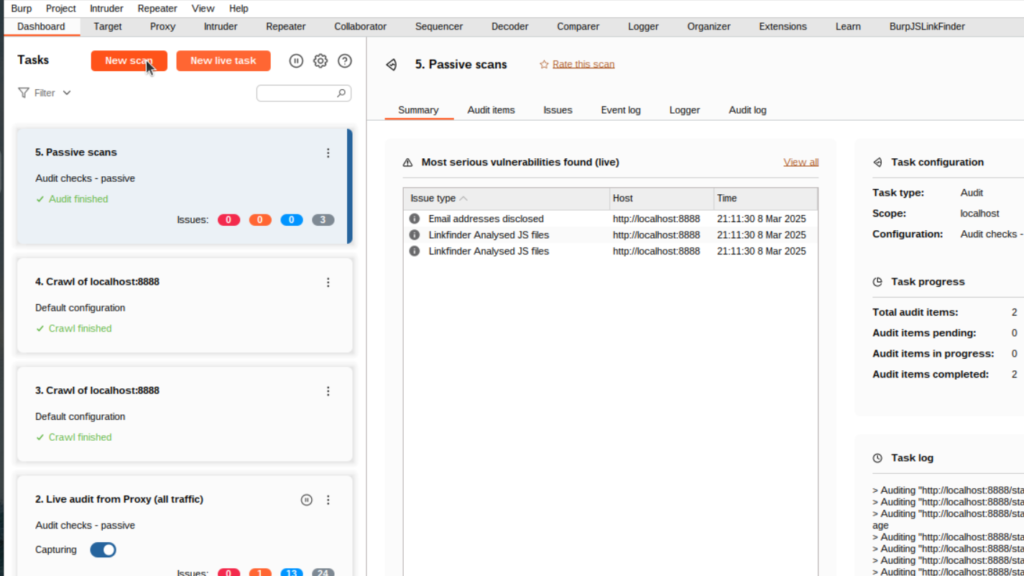
A window will pop up, asking us to choose a scan type. For our purposes (discovering more routes), I’ll select the Crawl option:

The other two options actively scan the target, which is noisier and will take longer. I highly recommend exploring those, but be wary that a WAF would most likely start blocking your traffic (or more annoyingly, ban your IP) if you get too noisy.
Next, add a list of URLs to scan.
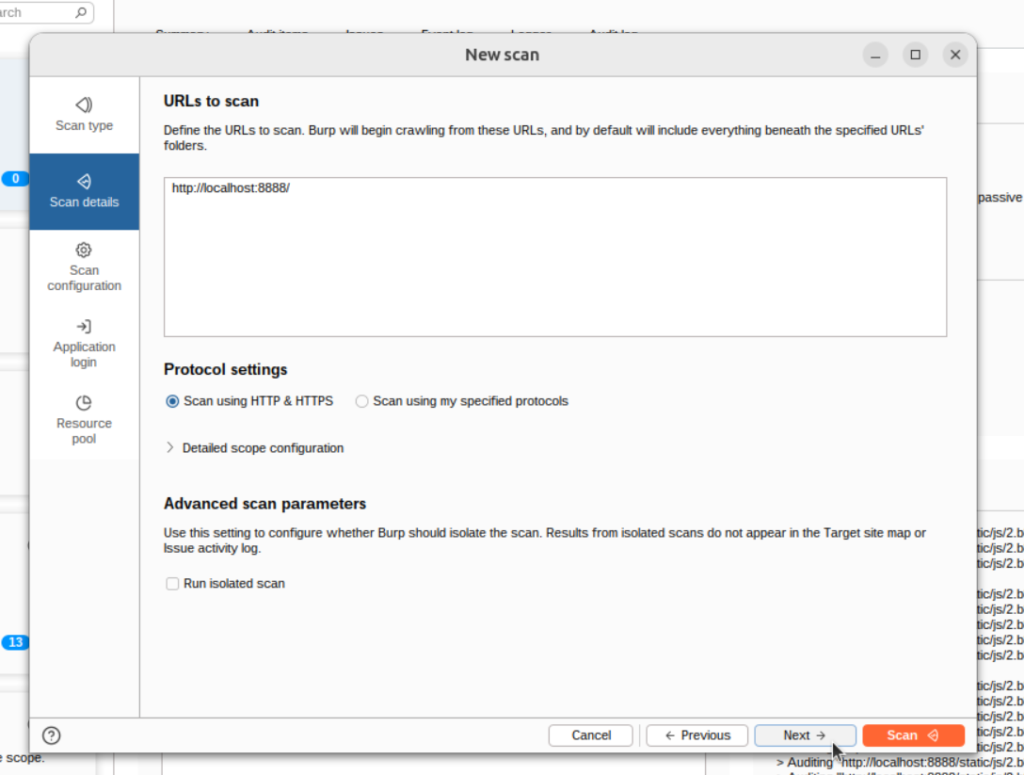
I’m skipping the scan and Resource pool configuration for simplicity. So, the last item we’ll configure is the Application login section. I’ll add my login credentials here:
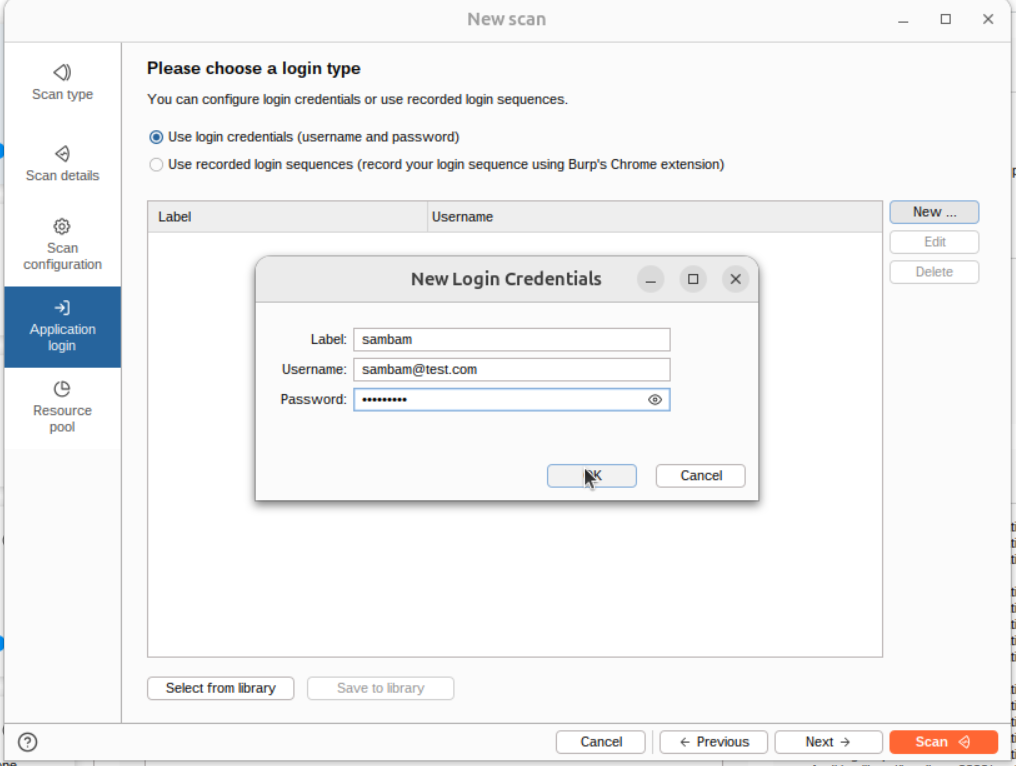
This allows the crawler to use the specified credentials whenever it finds a login form. Burp will be able to travel deeper into the application this way.
Without filling this out, it would just crawl the login page.
Now, we’ll hit the “Scan” button and let Burp explore the app for us.
Once the crawl finished, the summary page revealed that it found some new routes:
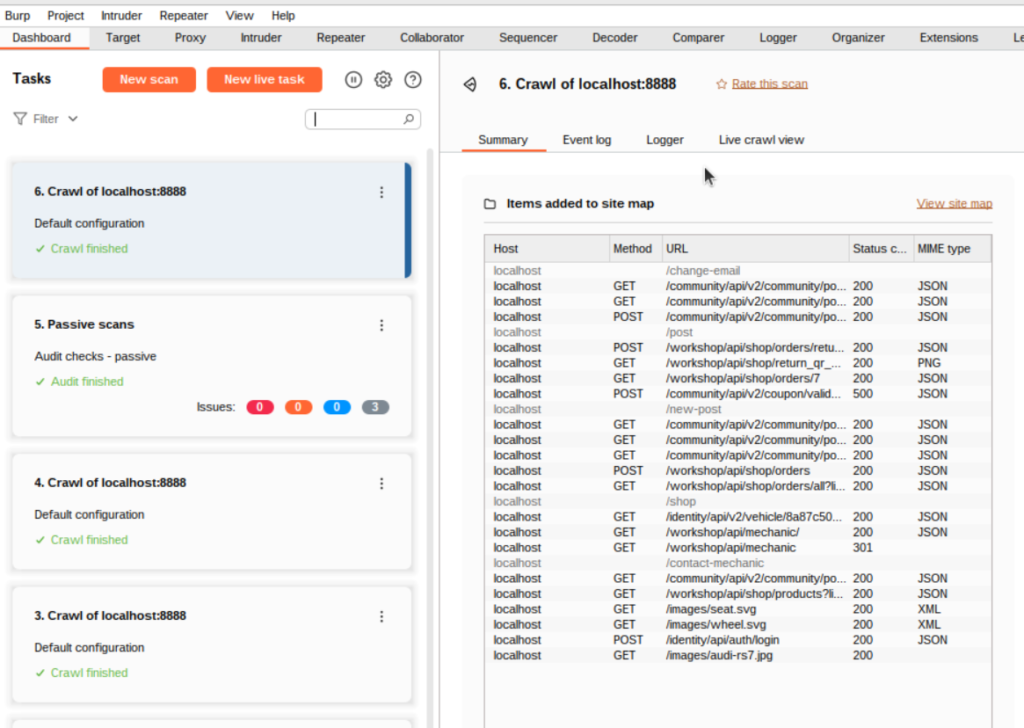
Burp even handily adds these to our Sitemap for us. How cool!
Using JSLinkFinder
Burpsuite’s crawler is just one tool we can use to discover more endpoints.
Instead of crawling the site, we can also parse the JavaScript for links using JSLinkFinder.
JSLinkFinder passively parses JS responses, so it most likely gathered links during the manual exploration phase. But, for demo purposes, I’ll show you how to trigger it incase it didn’t.
In the Proxy’s History tab, select the JavaScript responses, right click them, then select Do a passive scan:
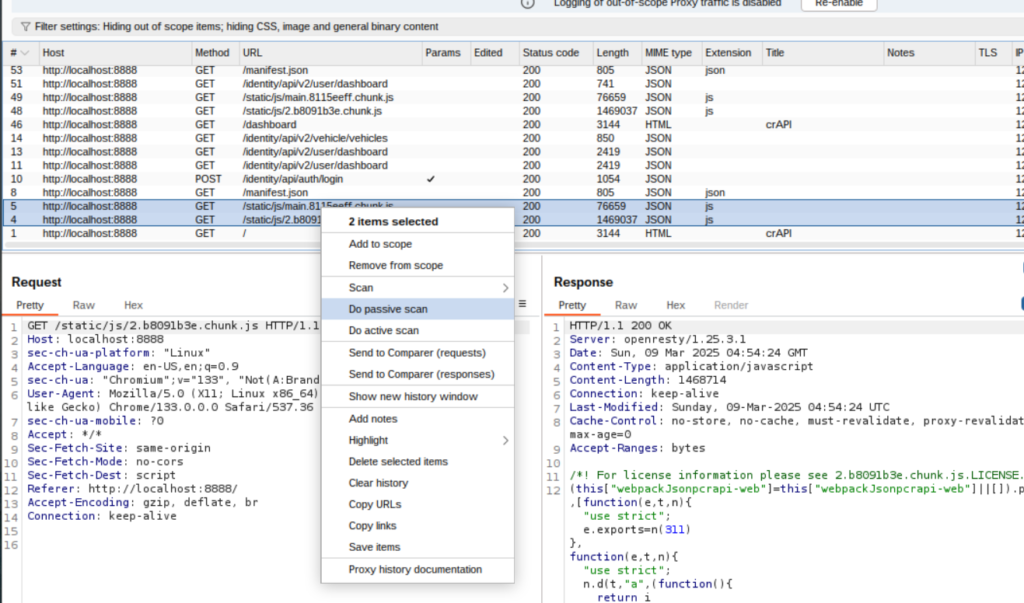
We can see that JSLinkFinder found some links in the BurpJSLinkFinder tab:

These will be automatically added to our sitemap. Unfortunately, since these are all out of scope, they won’t be of much use to us. But, it’s always good to explore options.
Now that we collected routes manually and automatically, it’s on to phase 3!
Step 3: Export the endpoints
I like to use the Sitemap in the Target tab when exporting API requests. It gives me a structured look at the API.
From the manual phase, we know that the crAPI API endpoints all contain api in the URL. We can filter the site map to get a more refined look at the API:
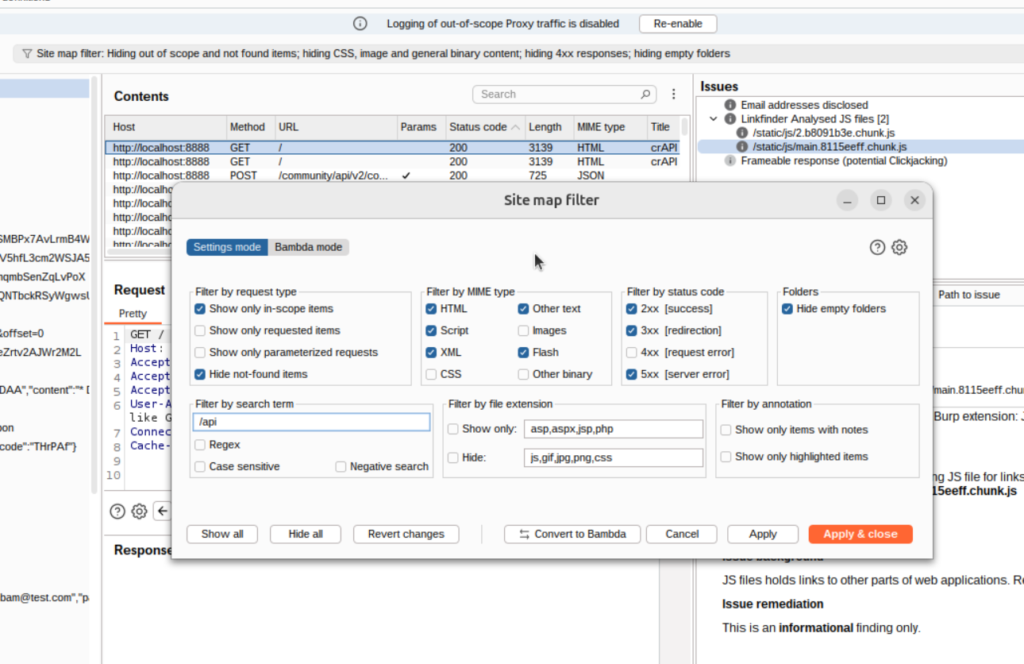
Much better. This is exactly what I want to be reflected in Postman:

To export the API routes, all we need to do now is right-click on the top-level URL and select Save selected items:

Save the file in a convenient location.
Note: There is an option to encode the requests/response data in base64. You can leave that on. Bupr2API does the decoding for us.
Now, we can leave Burp and head over to the command line.
Step 4: Converting to API spec
Finally, it’s time to use burp2api!
It’s as easy as running the python script and supplying the file as an argument:
$ burp2api.py crapi-api.req
Output saved to output/crapi-api.req.json
Modified XML saved to crapi-api.req_modified.xml
The output is saved in an output directory along with a second file. I moved the JSON file out of there and renamed it for convenience’s sake:
cp output/crapi-api.req.json ../crapi-api-spec.jsonNow, we can upload it to the online swagger editor just like any old spec file:

So simple and cool!
Now it’s time to import this into Postman:
Step 5: Importing to Postman
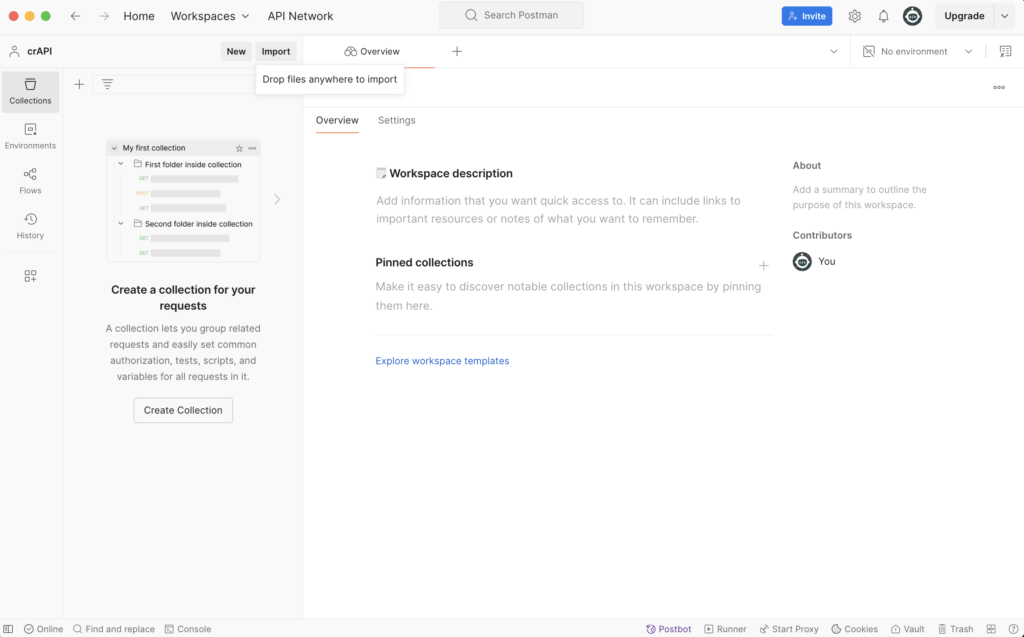
Open up Postman in a fresh workspace. Then, click the Import button at the top.
You can also just drag and drop the file anywhere in the window:
When prompted, choose the option to import as OpenAPI 3.0:
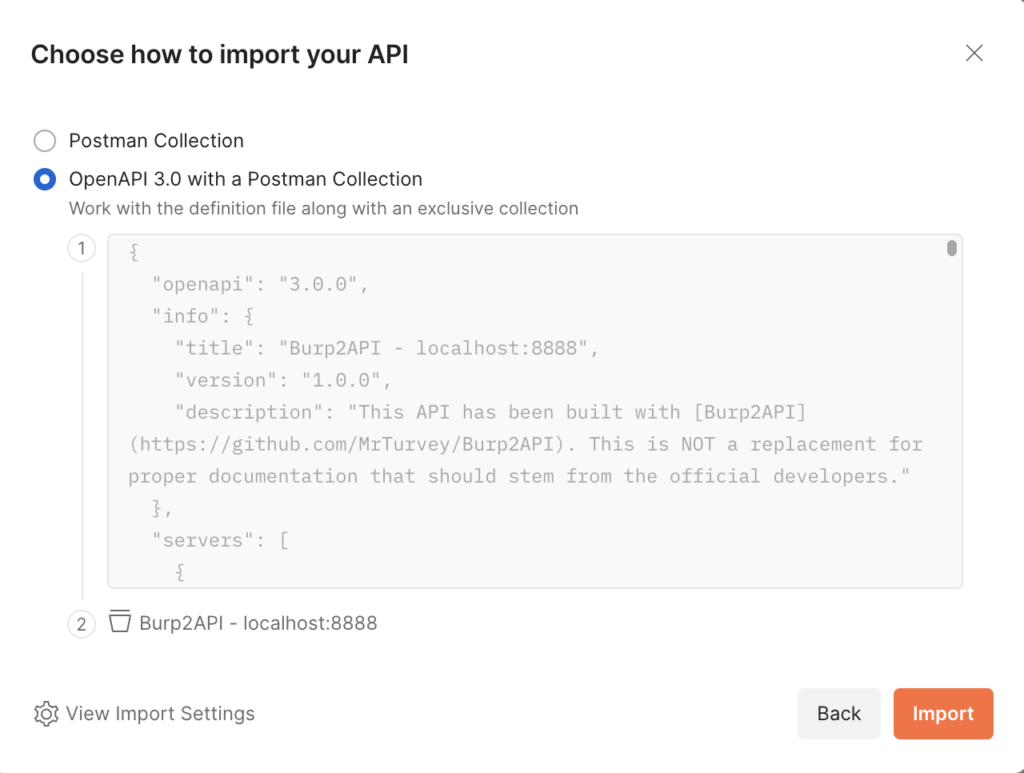
And finally, click Import.
Now, you should have a beautifully organized mapping of the API in Postman:
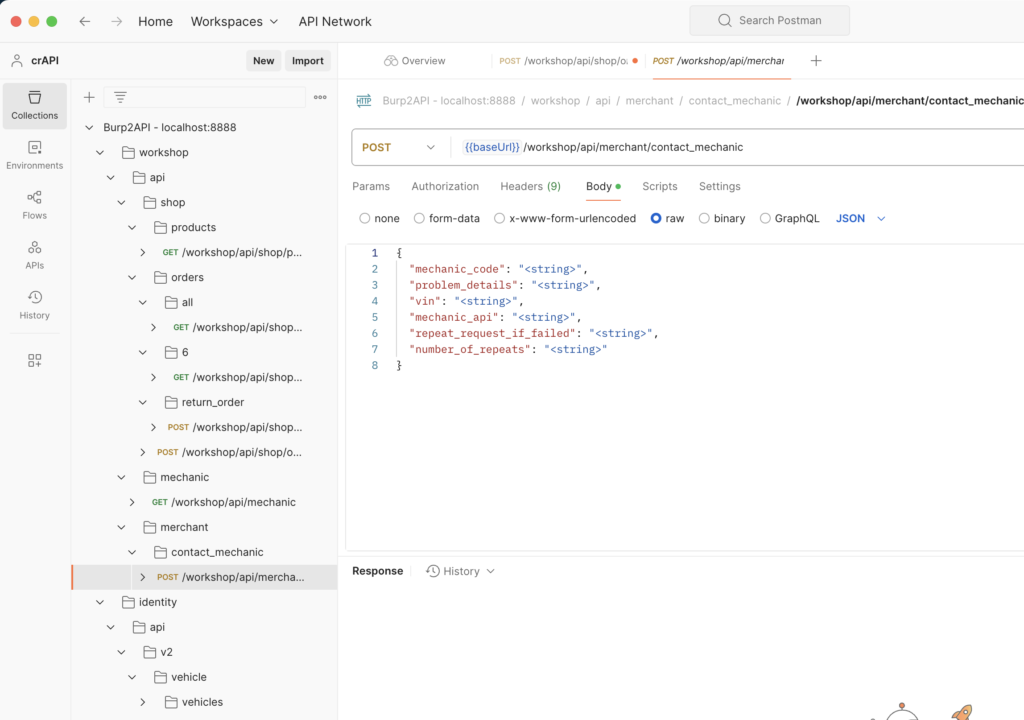
Why not just stay in Burpsuite?
You may be wondering why we went through the effort of migrating to Postman when we had all the data we needed in Burp structured exactly the way we wanted.
Ok, you might not have, but I’ll explain the method to my madness anyways.
This method of reverse engineering is great for when you are running continuous, structured security tests on a single API.
For example, at my job, the application I am testing makes use of an internal API. This API doesn’t have documentation or a spec file, so I would need to reverse engineer it to get the structure mapped out.
As a Quality Engineer, I need to continuously test the API to make sure that changes don’t introduce bugs or security flaws during each development cycle. Postman is great for automating this process as I can write automated tests, then run them on a nightly basis using a cron-job to ensure stability.
If you’re a pentester or bug bounty hunter, it may be more worth your time to just stay in Burp as you’re not likely going to be monitoring the API for the long-term.
In short, make sure you understand the context of your testing and choose what works best for you.
Conclusion
I hope you gained something from reading this!
This is typically the method I use for mapping as well as reverse-engineering APIs. So, you kind of got a two-for-one deal in this post!
I personally like this better than the mitmproxy -> mitmproxy2swagger approach. It’s simpler and removes my dependency on mitmproxy. Fewer tools, yay!
Please try this out for yourself against crAPI. Reading this post once and forgetting about it isn’t going to make you a better tester.
So, practice, practice, PRACTICE!
I also recommend you read Portswigger’s documentation on Burpsuite (even if you’re already familiar with the tool). The part walking through the pentest workflow using Burpsuite is highly valuable.
Also, explore the courses in APISec University if you’re new or even an intermediate web/API hacker.
Both of these resources are FREE so take advantage of them.
I wish you the best on your security journey! Keep learning!