So, here’s the deal: I recently got banned from Hack The Box. For five years. Why? Apparently, my last blog post leaked a few spoilers. A little harsh in my opinion…
Starting off the new year strong!!! 😀
In reflecting on it, though, I’ve realized something. As fun as Hack The Box is, it has its limits. It’s fantastic for challenging yourself, but it rarely dives into the “why” behind vulnerabilities or how to fix them. Many of the challenges lean toward the entertaining and the extreme rather than practical, real-world scenarios. And if you want hands-on, real-world scenario-level learning? You better be ready to fork over some extra cash.
Enter Build ‘N Break
I’m taking matters into my own hands. Introducing Build ‘N Break, a mini-course series where we’ll set up intentionally vulnerable systems and learn to hack (and secure) them. Think of it as a purple team approach that mixes red team (attacking) and blue team (defending) perspectives.
First step: Setting up our lab, an intentionally vulnerable Windows Domain Controller that mimics real-world enterprise environments.
What You’ll Learn
By the end of this guide, you’ll know:
- What a virtual machine (VM) is and why pentesters rely on them.
- How to create a virtual machine using VirtualBox.
Let’s dive in!
Tools You’ll Need
VirtualBox
We’ll use VirtualBox, a free tool for creating and running virtual machines. It’s lightweight and easy to use, perfect for setting up a safe and isolated environment for pentesting.
Why VMs are essential for pentesters:
- You own the network. Experiment without fear of damaging production servers or breaking the law.
- Cost-effective. No expensive hardware required. Just one computer.
- Fast setup and teardown. Clone your favorite configurations or discard them after use to avoid sensitive data leaks.
In my case, I’ll be running Ubuntu on my laptop, and with VirtualBox, I can boot up a Windows Server environment alongside it.
Windows Server
We’ll be using the latest version of Windows Server (2025) for our lab. Download it for free here. It’s a trial that lasts 180 days—more than enough for this course. If you’re in school, check if your institution provides free licenses through Azure; that’s how I snagged a Server 2022 and a bunch of other Windows machines for testing for free.
We’ll install Server Core, the GUI-less version of Windows Server. Why?
- It’s lighter on system resources.
- As an attacker, you’re most likely going to be interacting with Windows from a shell. Might as well get used to it now.
Lab Setup
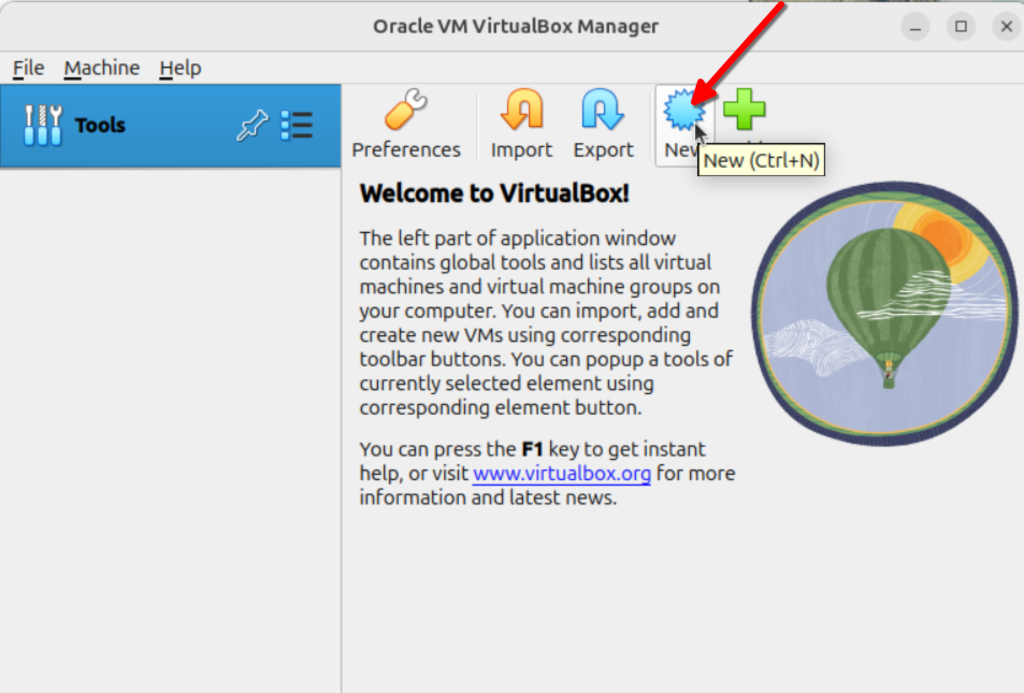
Step 1: Create a Virtual Machine
Open VirtualBox and click New to start a new machine.
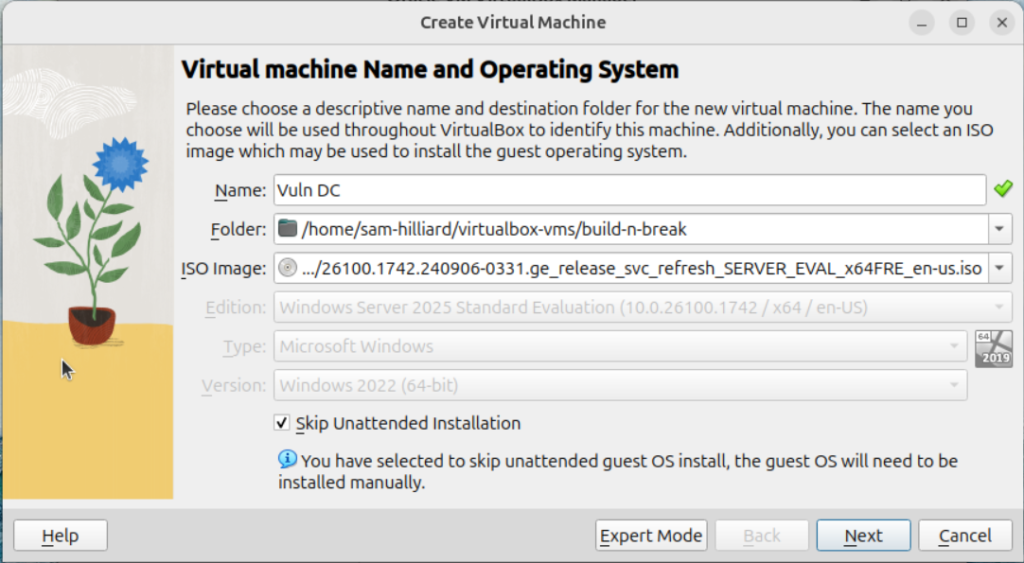
A pop-up will ask you to fill in some details:
- Name it something memorable (e.g., “Vuln DC”).
- Load the Windows Server ISO file you downloaded.
- Important: Check the box to skip unattended installation. We’ll walk through the install process manually to ensure we use Server Core.
Here’s what it should look like:
Step 2: Configure CPU and RAM
Windows Server Core has minimal requirements—512MB of RAM and 1 CPU core. I’m giving it a little extra juice with:
- 1GB of RAM
- 2 CPU cores
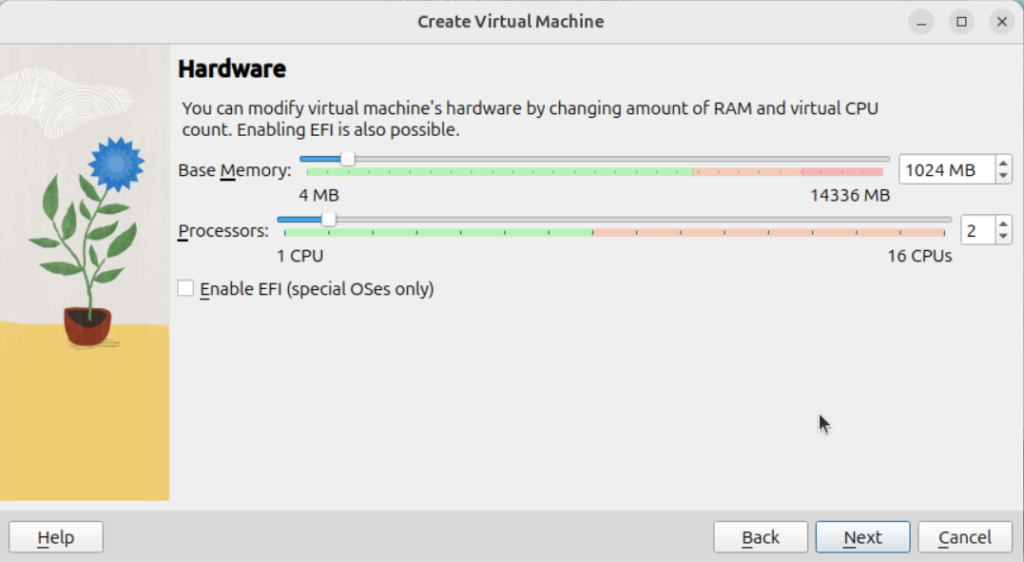
If your host machine can handle it, this ensures smoother performance. Remember, these are fractions of your host machine’s resources. Adjust as needed based on your setup.
You can always go back and adjust these later as needed.
Step 3: Choose Disk Size
The minimum space requirement is 32 GB for server 2025. However, I’m giving it 50 GB because I have some extra space to spare.
I’m also leaving the “Pre-allocate Full Size” checkbox unset. This allows the virtual hard disk to grow in size if more space is needed.
Domain controllers typically require extra space as well for storing user and network information. So, it could be a smart option to turn on in case we start running out of space.
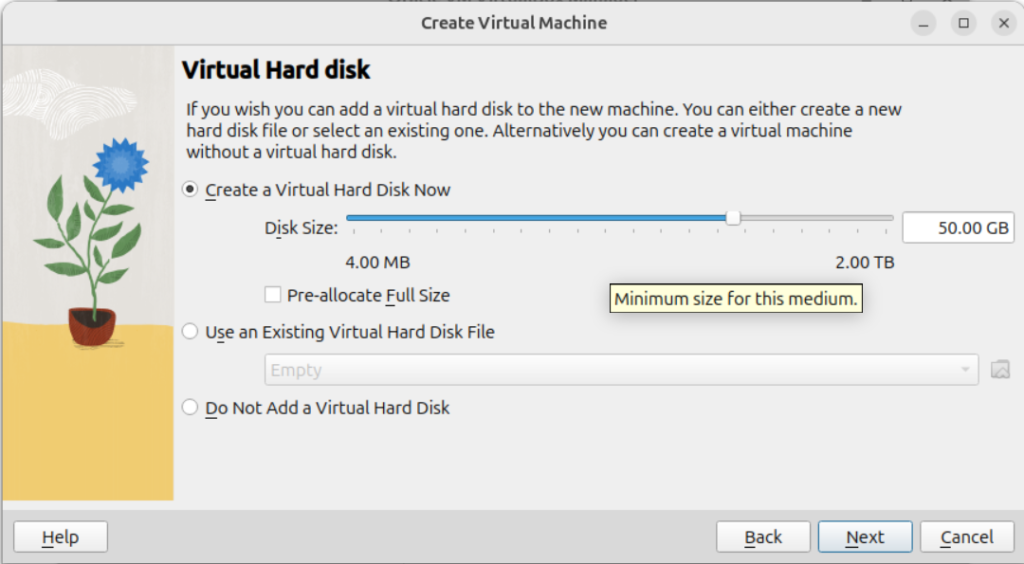
If you’re tight on space, you can store your VM on an external SSD. External HDDs tend to be too slow for virtualization. So, I don’t recommend them.
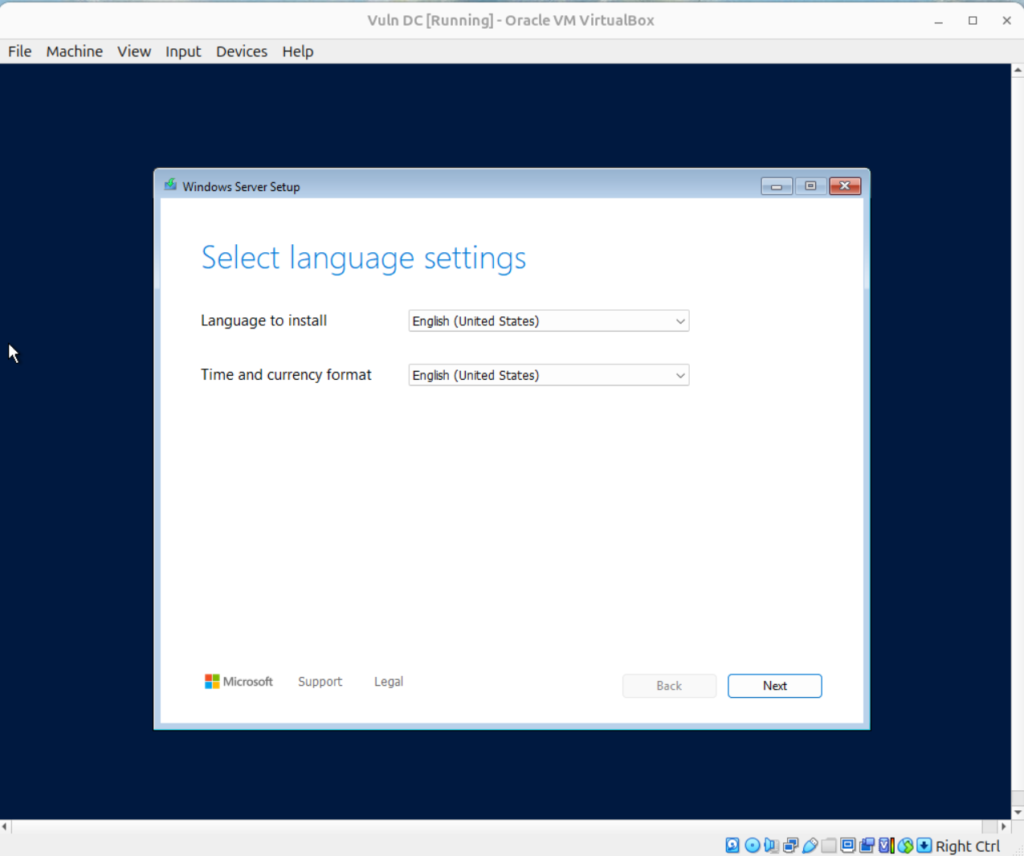
Step 4: Boot Your Machine
Once configured, your new machine will appear in VirtualBox’s list. Double-click it to boot up. If all goes well, you’ll land in the Windows Server setup screen. From here, we’ll walk through the installation in the next post.
Final Thoughts
Getting banned from Hack The Box was frustrating, but it’s also an opportunity. Instead of relying on external platforms, I’m building something I believe will provide better, more practical training for real-world scenarios.
Stay tuned for the next post, where we’ll install and configure Windows Server Core. This is just the beginning of Build ‘N Break. Let’s learn hacking the right way—by building, breaking, and fixing together.
Happy hacking! 😀