Introduction
In Part 0, we set up our lab environment by installing VirtualBox, downloading the Windows Server 2025 ISO, and configuring the virtual machine to boot from the ISO. If you haven’t completed those steps, go back to Part 0 for a full walkthrough.
Now, in Part 1, we’ll focus on setting up the Windows Server VM as a Domain Controller (DC). This DC will serve as the foundation of our lab, where we’ll explore AD attacks and defenses. By the end of this post, you’ll have a fully operational DC we’ll eventually use for some purple-team endeavors.
Server Installation
Initial Configuration
Boot the VM you configured in Part 0. You should see the Windows Server installation screen.
If this screen doesn’t appear, revisit Part 0 to fix any issues.
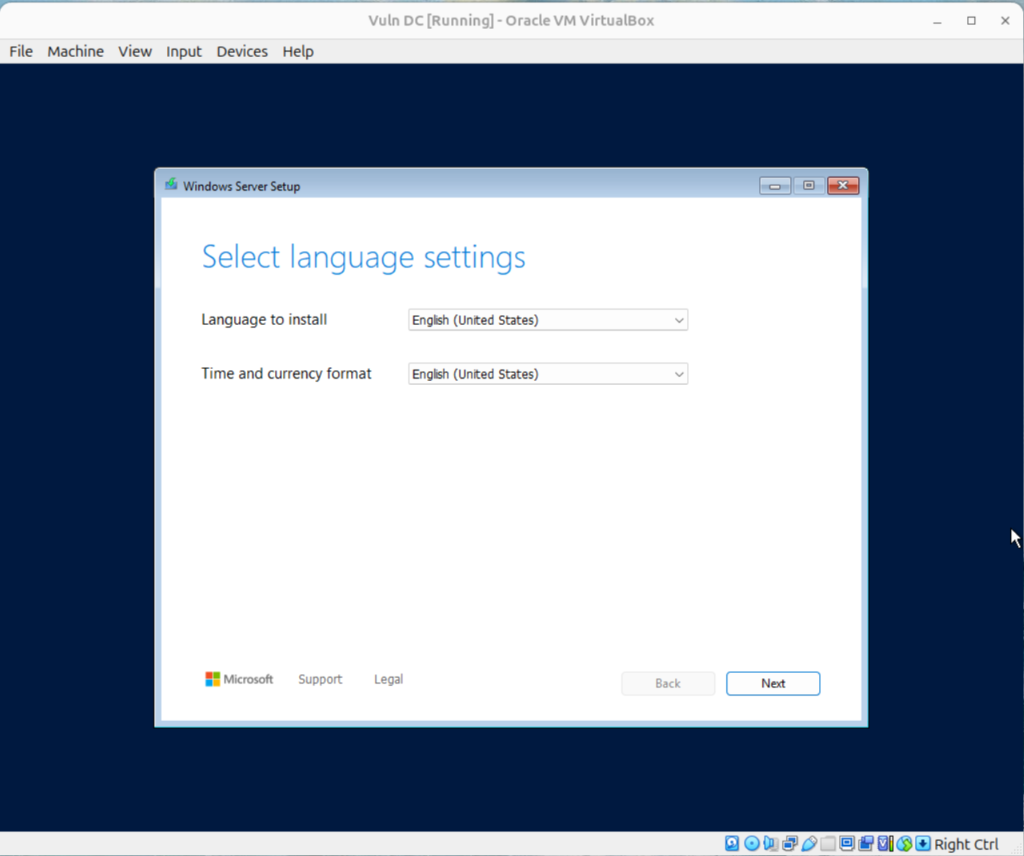
Select your preferred language and keyboard layout to proceed.
When prompted for installation type, choose Standard Evaluation (no desktop experience). The Standard Edition supports up to two VMs, which is sufficient for our use.

Accept the license agreement and click next (because you have no other option!).
Use the default settings for installation location; partitioning is unnecessary for our setup.
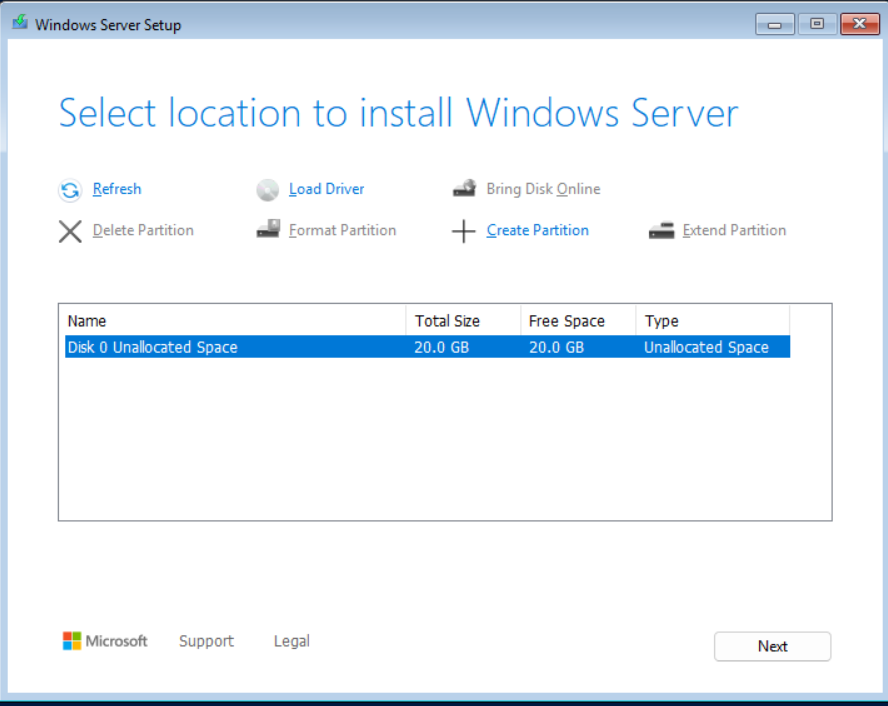
Let the installer run. If it fails, you may want to try increasing the allocated disk space for the VM.
Post-Installation Steps
After the VM reboots, you’ll be prompted to set the Administrator password. For this guide, we’ll use Password123 (remember, this is an intentionally vulnerable DC – we’re throwing security out the window)!
Log in, then, you’ll be prompted to configure diagnostic data collection. Select Required to continue.
Once logged in, you’ll be greeted by the sconfig menu, which simplifies server management tasks.

Change Computer Name (Optional)
Renaming the server can make it easier to identify in a lab with multiple VMs.
In sconfig, select Option 2 to rename the server. For this example, use VULN-DC.
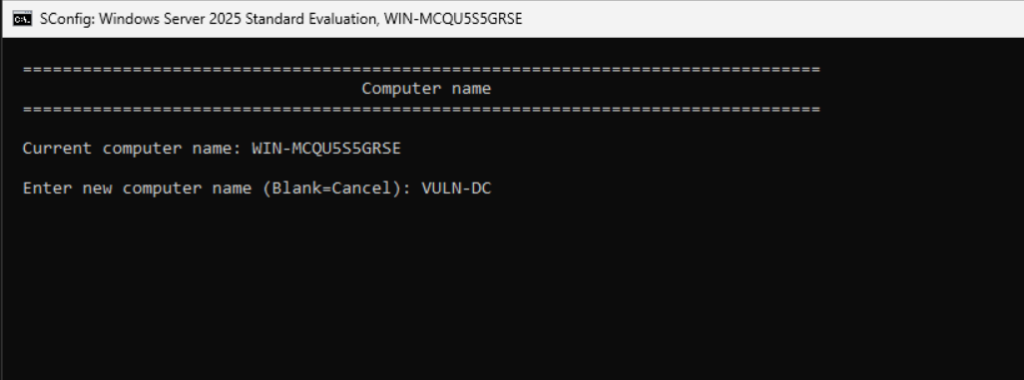
Restart the server when prompted to apply the new name.
Promoting the Server to a Domain Controller
Install Active Directory Domain Services (AD DS)
From the sconfig menu, choose Option 15 to open PowerShell.
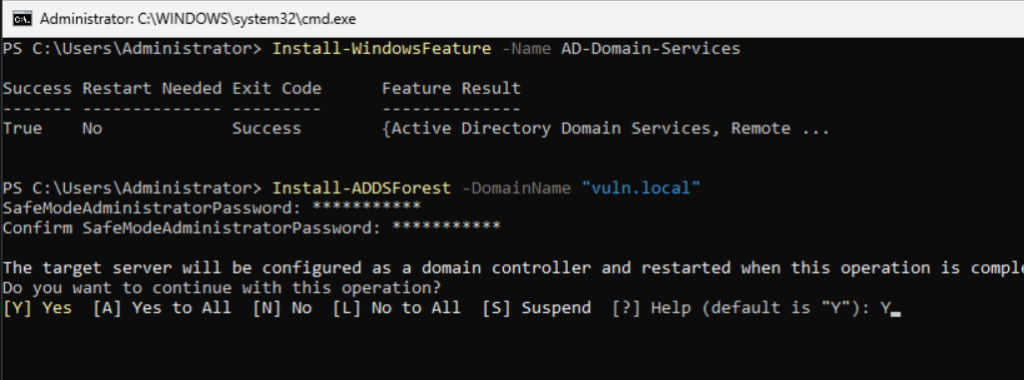
Install AD DS by running:
Install-WindowsFeature -Name AD-Domain-Services Ensure the VM is connected to the internet during this process. The default VirtualBox NAT connection should suffice.
Set Up a New Forest
Promote the server to a Domain Controller and create a new forest with the following command:
Install-ADDSForest -DomainName "vuln.local"During the process, you’ll be prompted to set a Directory Services Restore Mode (DSRM) password. I used the same password as the Administrator account for simplicity. Remember, we’re sacrificing security on purpose.
Confirm the reboot when prompted by typing Y.
After the server restarts, verify the domain promotion. Use sconfig Option 1 to confirm that the server name reflects the new domain (e.g., vuln.local).
By default, the server will also act as a DNS server. To confirm this, return to PowerShell and run:
ipconfig /allConfigure Static IP
Setting a static IP ensures consistent communication within your lab network.
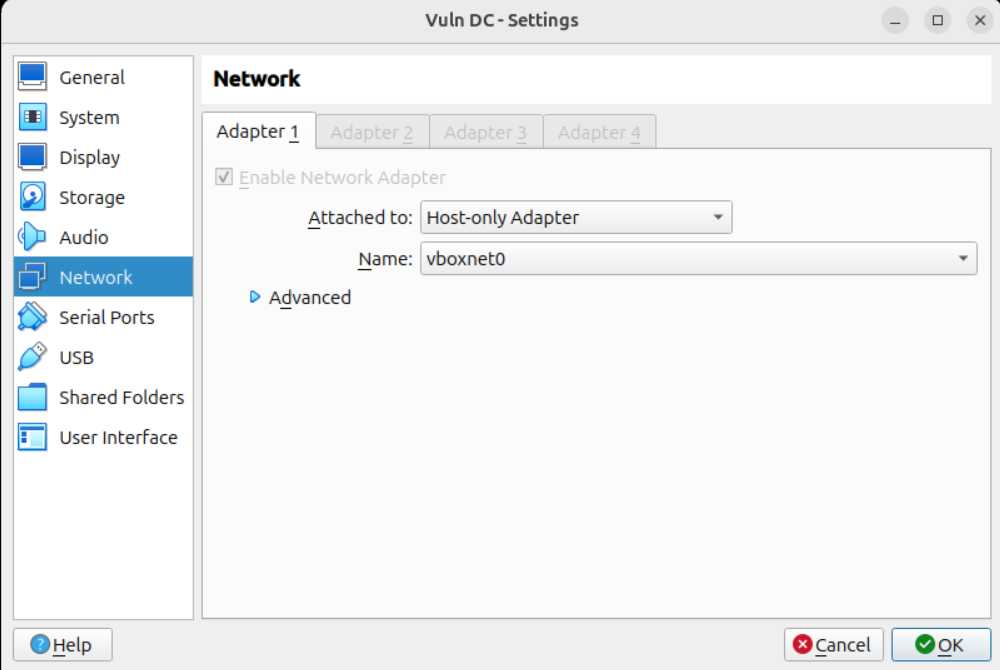
In VirtualBox, open the VM settings.
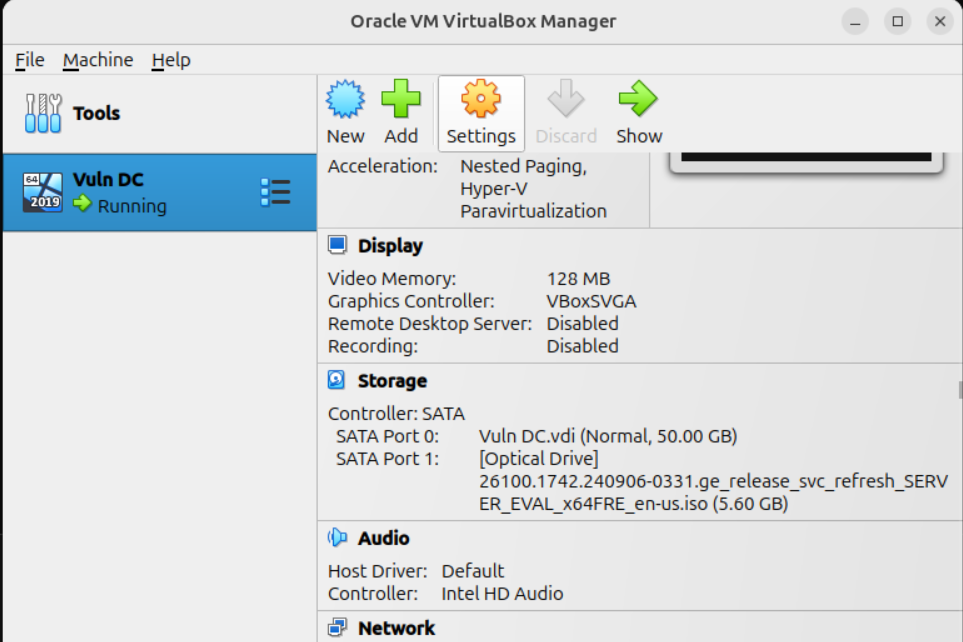
Navigate to the Network tab and attach a Host-Only Adapter.
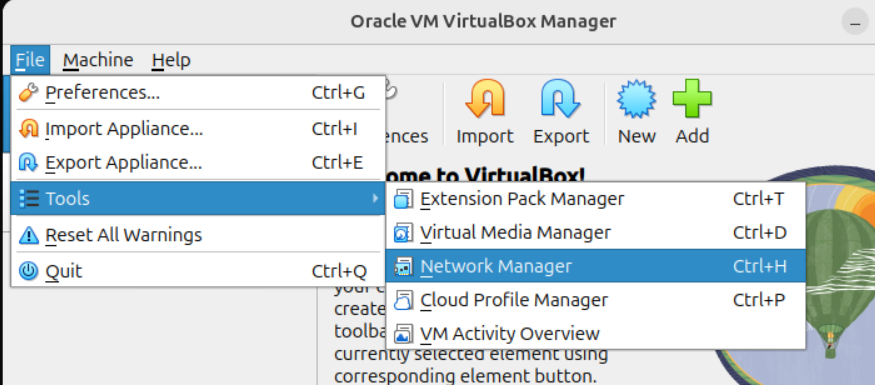
If no host-only network exists, create one via File > Tools > Network Manager.
Inside the VM, use sconfig Option 8 to configure the network adapter.
Then, choose the network adapter (5 in my case):
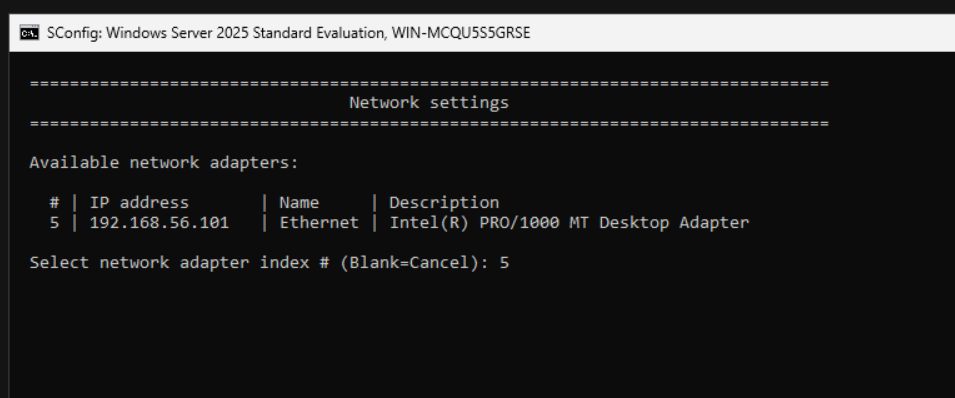
Assign a static IP (e.g., 192.168.56.10), subnet mask (255.255.255.0), and DNS server IP (same as the server’s IP).
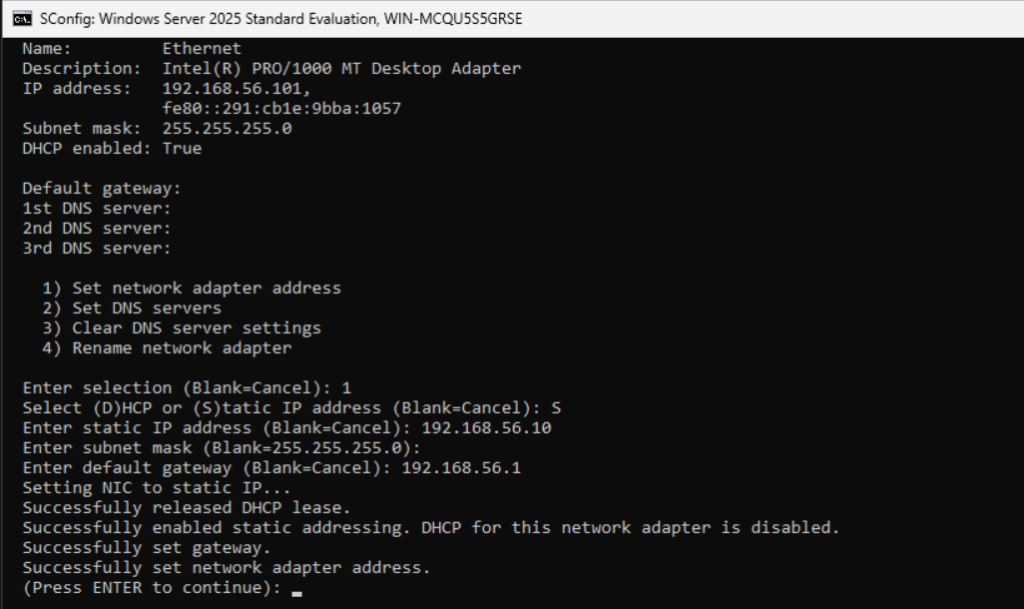
Verify connectivity by pinging the static IP from your host machine.
Adding Domain Users
Simulate an initial compromise by creating a standard domain user.
Open PowerShell using sconfig Option 15.
Create a new domain user with the following command:
net user /add <username> <password> /domainI created the user johnnyappleseed with password iLikeApples!
Verify the user was created successfully: net user. Your newly created user should be listed as part of the output.
Optional SSH Configuration
I usually ssh into my VMs, especially if there is no GUI to interact with. It’s easier to copy-paste commands, plus, I just like my native terminal better.
If you prefer managing the VM via SSH, follow these steps:
Start the OpenSSH server and enable it to start automatically:
Start-Service sshd Set-Service -Name sshd -StartupType AutomaticEdit the SSH configuration file (C:\ProgramData\ssh\sshd_config) to enable password authentication. Use notepad.exe to modify the file:
Locate and set PasswordAuthentication to yes.
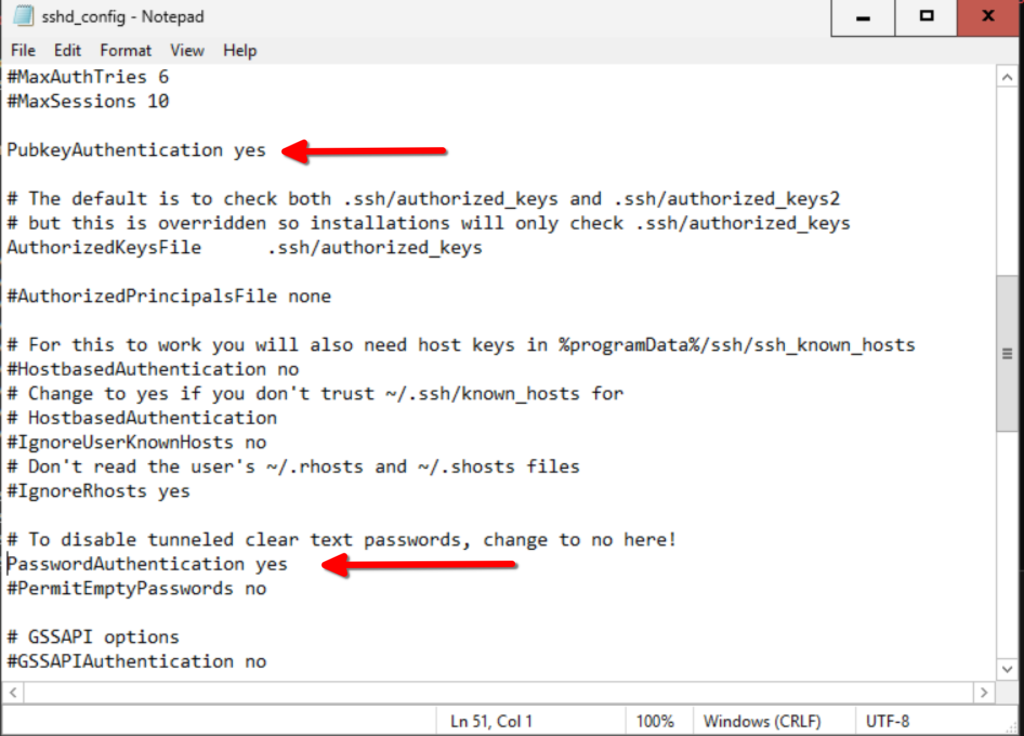
I went ahead and enabled public key authentication as well.
Restart the SSH service to enable the settings:
Restart-Service sshdIf you’re not able to connect, make sure the firewall allows inbound SSH connections:
Get-NetFirewallRule | Where-Object { $_.Name -like '*SSH*' }In my case, inbound SSH connections were allowed, but only in private networks:
PS C:\Users\Administrator> Get-NetFirewallRule | Where-Object { $_.Name -like '*SSH*' }

Name                          : OpenSSH-Server-In-TCP
DisplayName                   : OpenSSH SSH Server (sshd)
Description                   : Inbound rule for OpenSSH SSH Server (sshd)
...
Enabled                       : True
Profile                       : Private
Platform                      : {}
Direction                     : Inbound
Action                        : Allow
...
I guess the way host to guest connection through a host-only adapter counts as a Public network. Updating the rule fixed my connectivity issues:
Set-NetFirewallRule -DisplayName "OpenSSH SSH Server (sshd)" -Profile PublicTest the SSH connection from your host machine to the VM.
Conclusion
In Part 1, we set up a Windows Server VM, promoted it to a Domain Controller, created a domain user, and optionally configured SSH for easier access. This establishes a solid foundation for learning Windows AD attacks and defenses.
Next, we’ll dive into implementing some common misconfigurations so that we can exploit them, then fix them. It’s about to get interesting so stay tuned for part 3!