Hello again! It’s been a while but I’m back after a bit of a break! In this post, I’m going to show you how to set up an evil twin wireless access point. This post is going to be part of a series of posts detailing different attacks we can build off of this simple implementation. So stay tuned for that! I’ll also host a scripted version of our evil twin so you can use and build off of it.
Evil Twin?
No, we’re not talking about those weird girls from The Shining. An Evil Twin or Rouge AP, is a wireless access point made to look exactly like a normal one. Only it’s evil.
Evil in the sense that if you connect to an attacker-controlled access point, this puts your device between them and the internet, allowing them to view and modify your traffic. This is a type of Man In the Middle Attack.
Attackers have also been known to host fake captive portals on their Evil Twins, tricking people into giving away sensitive information (like WiFi passwords).
If you have ever heard someone tell you “not to connect to sketchy WiFi,” Evil Twins are part of the reason behind that.
This attack is especially dangerous because most devices will automatically connect to networks with the same name as familiar ones. So, if an Evil Twin has a stronger signal than the original (or the connecting client is closer), the victim device will be forced to connect to it (after disconnecting from the original).
Prereqs
Before we get started, you’re going to need a few things before following along.
- Linux – can be a Virtual Machine or a native install (I don’t care)
- Wireless Card – has to support master and monitor mode. Check out this article for some recommendations.
- Software: hostapd and dnsmasq
Most penetration testers use some form of Linux because many open-source tools (like the tools we’re about to use) mainly support Linux. It’s also easier to work directly with hardware than with something like Windows. So, get used to it!
hostapd is going to make our WiFi card behave like an access point in a mode called master. This allows clients to associate with our WiFi card instead of the other way around.
dnsmasq is going to serve as our DHCP server. When people connect to our Evil Twin, they will need IP addresses just like a real wireless network. Otherwise, they won’t be able to connect.
Why not just use a hotspot?
You might be thinking, “Why use all of these command line tools when an evil twin is basically just a hot spot?” Many operating systems will have software loaded on them by default to turn your WiFi card into a station. You may even have this option on your smartphone. While this might seem like an easy option for us (and will likely be a GUI), we are extremely limited.
With a hotspot, we can’t change things like what channel the station is running on or its BSSID. These are things that can clue more advanced users into sussing out the fake access point.
We also cannot control our network as meticulously. A captive portal attack, for example, wouldn’t work without jumping through a bunch of hoops.
Plus, we are going to script this process and make it even easier than setting up a hotspot.
Finding Victims
For our attack to be successful, we’re going to need someone to connect to our evil twin. There are a couple ways you can go about this:
We can view the network around us using a tool like airodump-ng. If you’re new to airodump-ng check out my post about it. So, let’s get our interface into monitor mode and fire up airodump-ng. As you can see in the top right, I’m sorting by power level:
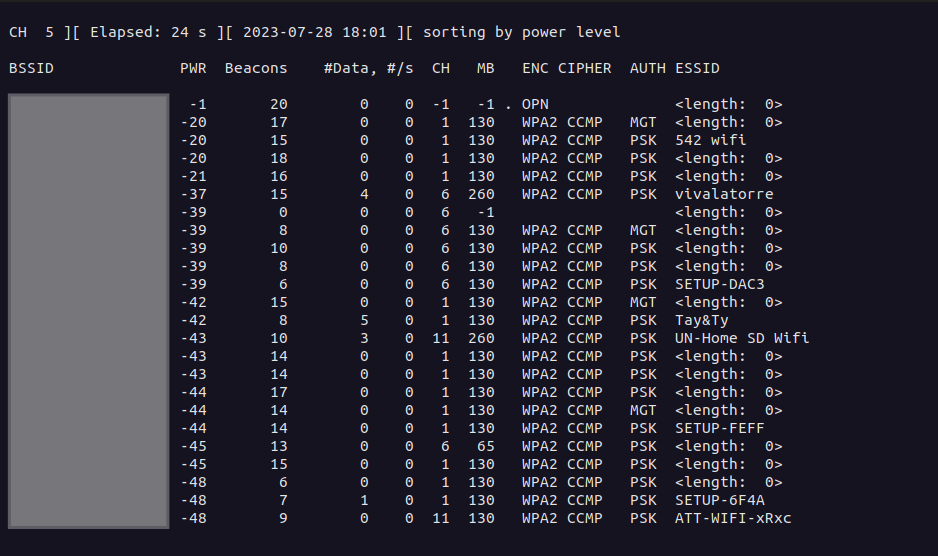
You can switch between sorting options while airmon-ng is running by hitting s. Sorting by power level allows me to easily see what stations are nearby. The ones at the top, with the highest power level, are the closest.
Alternatively, we can see what devices are sending out probe requests. We can use airodump-ng then analyze the results with air-graph-ng as I detailed in my post on airodump-ng, or we can view probe requests in real-time with probequest:

For the best results, run airodump-ng in the background so that your card in monitor mode is continuously hopping across channels. Now, we have a list of ESSIDs that we could use to trick probing devices into connecting to!
Setting up our Evil Twin
Ok! Let’s get into the fun stuff! Before we begin, a quick thing to note. Most tutorials I’ve read swear that you have to keep your wireless interface in monitor mode for this to work. Since the interface needs to run in master mode to behave like an access point, I found this a bit redundant. Running hostapd would most likely just switch your card to master mode if you left it in monitor mode.
If you’re not able to get this to work leaving your interface in managed mode, by all means, try switching it to monitor mode. I’ve had success both ways.
Configuring dnsmasq
In order to have clients establish a connection to our fake access point, we’re going to need to assign them an IP address. That’s where dnsmasq comes in!
To configure it, we need to create a file (I called mine dnsmasq.conf) with the following contents:
# Our evil twin's interface
interface=wlan0

# IP range and netmask with 8 hour lease time
dhcp-range=192.168.1.10,192.168.1.100,255.255.255.0,8h

# Gateway IP
dhcp-option=3,192.168.1.1

# DNS Server IP (same as gateway)
dhcp-option=6,192.168.1.1

#logs
log-queries
log-dhcp
Everything following a # is a comment. I sprinkled a few in there to help break things down for you.
Basically, I told dnsmasq to assign clients an IP address in the range 192.168.1.10-100, set the gateway as 192.168.1.1, and log activity for debugging later.
Note: You should plan on using an address range that is not the same as is assigned to your internet-connected interface (if you have one). If you do, you will lose your internet connection when we configure our interface for routing. For example, my other interface is connected to WiFi and assigned an address in the range 192.168.0.0/24 so I chose the address range for my evil twin: 192.168.1.0/24. A subtle but impactful difference.
That’s all you need to setup dnsmasq. Pretty easy!
Configuring hostapd
Like dnsmasq, we can use a config file to tell hostapd what to do when it runs. In the same directory, create another file (mine is called hostapd.conf) with the following:
interface=wlan0
driver=nl80211
ssid=test1234
bssid=AA:BB:CC:DD:12:34
hw_mode=g
channel=8
macaddr_acl=0
ignore_broadcast_ssid=0
Just like with dnsmasq we’re going to use wlan0 as our interface for hostapd. Reading the file, it’s pretty clear that we’re setting up an AP that has an SSID of “test1234”, has a BSSID of AA:BB:CC:DD:12:34, and is operating on channel 8.
However, there are some other options you might not recognize:
driver=nl80211: Sets the driver tonl80211which is pretty standard when usinghostapdon Linux.hw_mode=g: The WiFi version to operate on. In this case, we use 802.11g for the broadest device support operating on the 2.4GHz band. If you’re targeting a 5GHz router, you may want to bump up to a newer standard liken, ac, etc… For more info check out this article.macaddr_acl=0: turn off MAC filtering (we want anyone to join our network)ignore_broadcast_ssid=0: our SSID will be broadcasted (not hidden)
In a real-world scenario, an attacker would make a clone of the victim’s access point. Or they could bait people with an SSID like “University Guest” or “Public WiFi.” For testing purposes, we’re just going to make an obviously (hopefully) fake access point.
We’ve got all the configuration files we need. There’s just one last thing we need to take care of before launching our attack.
Setting up our interface
Our interface is going to act as a DHCP server once we get dnsmasq up and running, but it can’t assign an IP address to itself. So, we need to go ahead and assign it the IP address of the gateway (192.168.1.1):
$ sudo ifconfig wlan0 192.168.1.1 netmask 255.255.255.0Let’s run ifconfig to make sure our changes stuck:
$ ifconfig

wlan0: flags=4099<UP,BROADCAST,MULTICAST>  mtu 1500
        inet 192.168.1.1  netmask 255.255.255.0  broadcast 192.168.1.255
        ether 9c:ef:d5:fe:e0:20  txqueuelen 1000  (Ethernet)
        RX packets 0  bytes 0 (0.0 B)
        RX errors 0  dropped 0  overruns 0  frame 0
        TX packets 0  bytes 0 (0.0 B)
        TX errors 0  dropped 0 overruns 0  carrier 0  collisions 0
Perfect!
We also need to add a routing table so that incoming traffic is routed to our gateway:
$ sudo route add -net 192.168.1.0 netmask 255.255.255.0 gw 192.168.1.1Basically, we’re making our network card behave like a real wireless router would. Again, we’ll verify our changes with route:
$ sudo route

192.168.1.0     0.0.0.0         255.255.255.0   U     0      0        0 wlan0
Looks good to me!
And that’s it! Two commands and our card is all set up.
Launching our attack
Now that we’re all set up, running our attack couldn’t be easier.
First, fire up dnsmasq:
$ sudo dnsmasq -C dnsmaq.conf -dThe extra -d option is to tell dnsmasq to output helpful messages for debugging.
If you get a message telling you that port 53 is already being used by another process, there are a couple of workarounds. You can tell dnsmasq to run on a different port, or you can kill the process.
I’m going to kill it because I’d rather have a dnsmasq listening on the default DNS port:
$ sudo kill $(sudo lsof -i:53 -t) && sudo dnsmasq -C dnsmasq.conf -d This will use lsof to search for processes running on port 53, pass the process IDs to kill so that they can be terminated, then runs dnsmasq right after so the interrupting process doesn’t get a chance to fire back up.
Just be careful when doing this as it may kill something important. I had firefox running on the side and it shut that down.
Next, we run hostapd in a separate terminal and that’s even easier:
$ sudo hostapd hostapd.confNow, you should be able to connect to your fake access point. Pretty easy right?
If it wasn’t and you ran into trouble, check your logs. On Debian-based systems, reading /var/logs/syslogs can be helpful. I ran into trouble because my firewall was blocking dnsmasq. Always check your logs before running to the internet. It will definitely save you some time.
If you try to use the internet while connected to your evil twin, it won’t work. That’s to be expected. We haven’t forwarded traffic to our internet-connected interface so that it can give our clients access to the internet.
We’ll set that up in a future tutorial, but for now, you have a good base to work with to start building attacks.
Conclusion
Now you know the power and simplicity of building an evil twin access point! Give yourself a pat on the back for sticking with me to the end (and hopefully following along).
In future tutorials, we’ll add to our evil twin to make it more…well…evil.
You might also be thinking “This is a lot to remember and type out, I don’t want to do this every time I need an evil twin.” So, the next step for you to take on your own is to script this process!
I already created a script hosted on my Github. You can use it as a guide but I highly encourage you to try scripting your own evil twin. You’ll probably make a better script than I did anyways.
There are also plenty of scripts out there that automate this process, like airgeddon, wifiphisher, fluxion…you get the idea. While these tools are great, you’ll learn a lot by building your own. Plus, you’ll be able to make something that is unique to your specific use-case.
For example, with airgeddon, I can only create an evil twin, but what if I wanted to make “(Evil) Free Public WiFi” in a highly trafficked area that doesn’t have any public wifi? That’s where your hacker knowledge separates you from the rest!
Stay tuned for more evil twin-related posts!